
10 Painted Garden Marker Rocks That Make Gardening More Charming
There is something oddly delightful about labeling plants with hand painted rocks instead of plastic tags that disappear into the soil after two rainstorms.
Painted garden marker rocks add personality, warmth, and a slightly whimsical touch to outdoor spaces without feeling overly decorative. They make herb gardens feel more intentional, vegetable beds look more charming, and flower patches feel a little more storybook inspired.
The best part is that they are wonderfully imperfect. Slightly crooked lettering, uneven brush strokes, and handmade details are exactly what make them feel cozy and personal.
These painted garden marker rock ideas are practical, creative, and surprisingly relaxing to make.
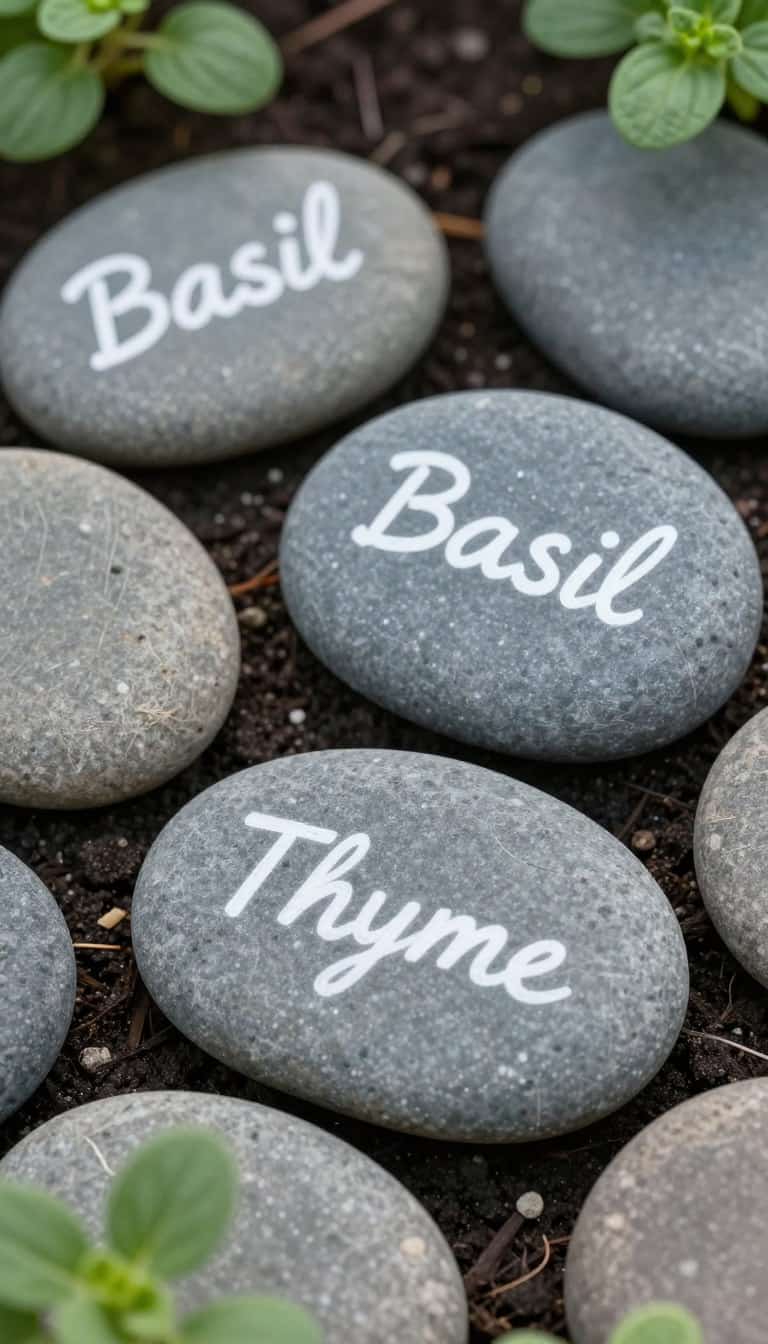
1. Minimal White Lettering on Smooth River Rocks

Sometimes the simplest designs end up looking the most elegant.
Smooth gray or beige river rocks paired with soft white handwritten lettering create clean, timeless garden markers that work beautifully in herb gardens and raised beds. They feel calm, understated, and quietly stylish.
- Simple lowercase lettering looks softer than block capitals
- Matte sealers help preserve the natural stone texture
- Neutral stones blend beautifully into cottage gardens
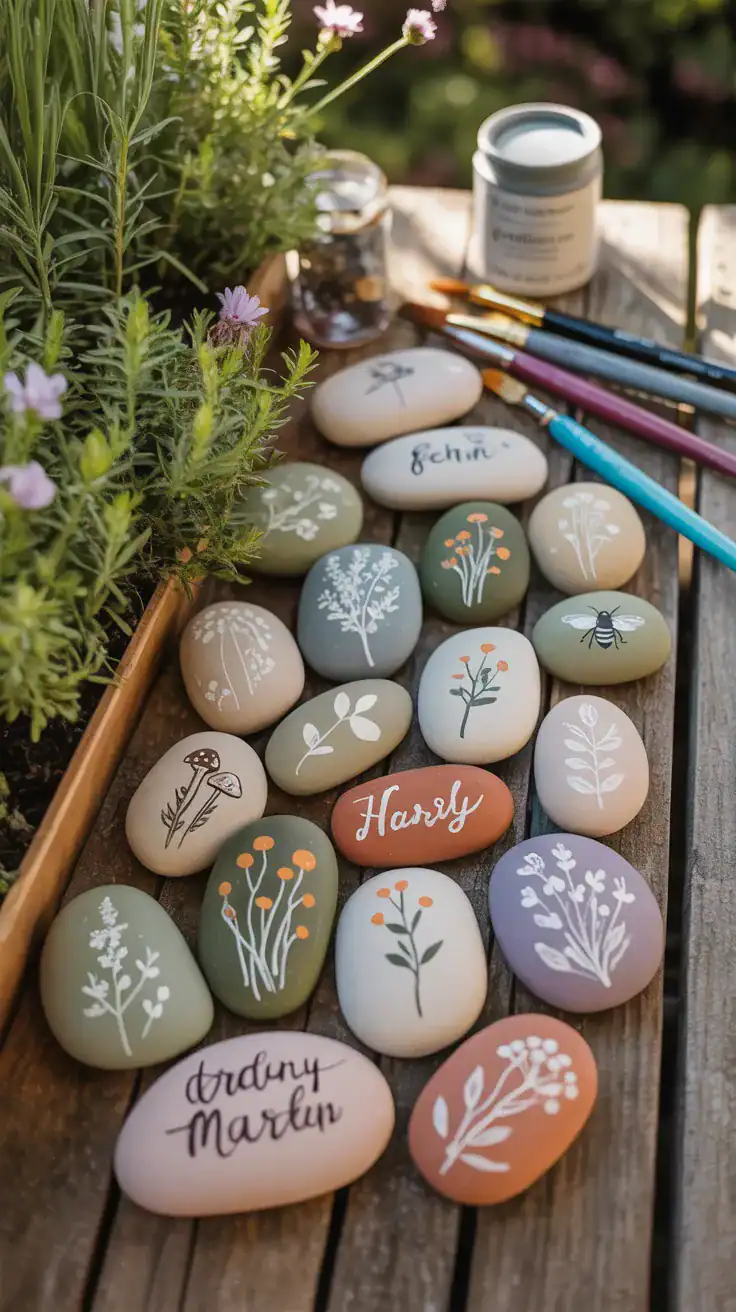
2. Cottagecore Floral Herb Rocks

Tiny painted flowers instantly make herb markers feel more charming.
Paint little lavender stems beside “Lavender,” tiny basil leaves next to “Basil,” or delicate daisies framing herb names. The imperfect hand painted style adds warmth without looking overly polished.
These look especially beautiful tucked into overflowing herb planters.
- Soft sage, cream, and lavender tones work beautifully
- Thin paint pens make delicate details easier
- Small floral accents keep the rocks feeling balanced
3. Rustic Vegetable Garden Rocks

Vegetable markers can become part of the garden decor instead of purely functional labels.
Paint warm earthy vegetables like carrots, tomatoes, pumpkins, or beets onto large flat stones for a rustic farmhouse look. They make vegetable beds feel cheerful and organised at the same time.
- Terracotta and olive tones feel naturally garden inspired
- Larger rocks are easier to read outdoors
- Imperfect brush strokes add rustic charm
4. Black and White Botanical Marker Rocks

This style feels modern, clean, and surprisingly sophisticated.
Use matte black stones with simple white botanical sketches and plant names for a minimalist garden aesthetic that still feels artistic. The contrast makes the labels easy to read while looking stylish.
- White paint pens create crisp details easily
- Ferns and leaf outlines work especially well
- Matte finishes feel softer and more natural outdoors
5. Mushroom and Woodland Garden Rocks

Whimsical woodland details instantly make a garden feel more magical.
Tiny mushrooms, snails, ferns, and acorns paired with herb names create playful markers that fit beautifully into cottage gardens and shady planting areas. They are especially charming around wildflower beds.
- Mossy greens and warm browns create earthy palettes
- Loose painterly details feel softer than perfect lines
- Rounded rocks work beautifully for mushroom shapes
6. Watercolor Style Flower Marker Rocks

Not every painted rock needs bold outlines and heavy detail.
Soft blended flowers create dreamy garden markers that feel artistic and relaxed. Lavender washes, blush pink petals, and soft greenery work beautifully here. This style feels calming without trying too hard.
- Soft blended edges create a hand painted feel
- Floral clusters look more natural than single flowers
- Cream lettering keeps the designs readable
7. Bee and Butterfly Pollinator Rocks

Pollinator themed markers feel cheerful while celebrating the busiest workers in the garden.
Paint tiny bees, butterflies, and wildflowers onto rocks marking pollinator friendly plants like lavender, echinacea, or salvia. They instantly brighten flower beds and make the space feel more alive.
- Golden yellows add cheerful contrast
- Tiny dotted flight trails add personality
- Flat stones work best for detailed insects
8. Boho Sun and Rainbow Garden Rocks

Muted rainbow arches and little sunshine motifs create a softer boho inspired garden look.
Warm clay, mustard, dusty pink, and cream tones feel relaxed and modern while still being playful. These garden marker rocks work especially well in container gardens and patio planters.
- Earthy muted palettes feel calmer outdoors
- Curved shapes are beginner friendly to paint
- Matte sealers preserve the soft boho look
9. Vintage Seed Packet Inspired Rocks

Old fashioned seed packet illustrations make surprisingly beautiful garden markers.
Think delicate carrots, old style tomatoes, wildflowers, and handwritten typography inspired by vintage botanical artwork. These feel nostalgic, decorative, and full of personality.
- Slightly faded colors create vintage charm
- Handwritten labels feel more authentic
- Botanical illustrations work best on larger stones
10. Tiny Landscape Garden Rocks

Mini painted countryside scenes somehow make gardens feel even more peaceful.
Paint rolling hills, tiny cottages, flower meadows, or sunsets behind simple plant names for decorative markers that feel almost storybook inspired. They are tiny pieces of garden art disguised as labels.
- Soft sunset palettes create warmth instantly
- Tiny silhouettes add depth without much detail
- Oval stones work beautifully for landscape scenes
Essential Materials for Creating Painted Garden Marker Rocks
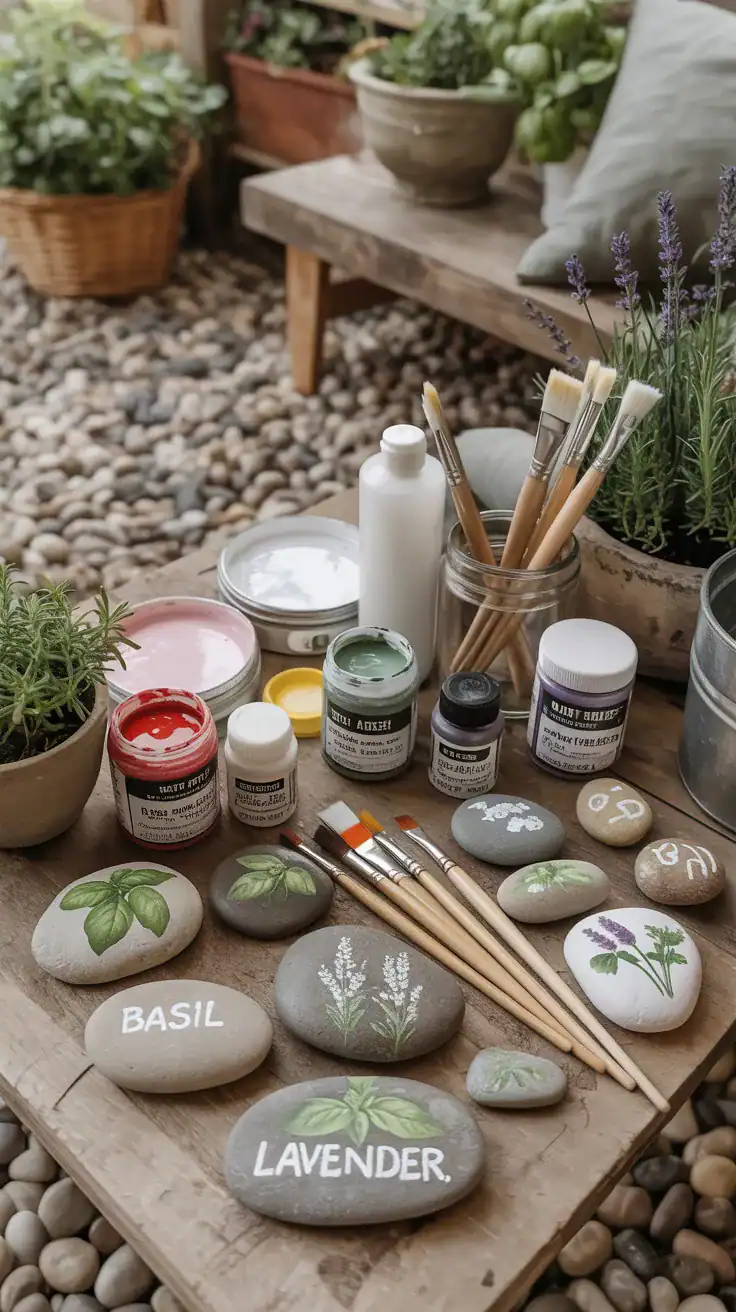
Gathering the right supplies before starting your painted garden marker rocks project makes the whole process smoother and much less chaotic. Nobody wants to be halfway through painting basil leaves and realise the sealer is missing. Naturally.
You do not need a huge craft cupboard for this project. A few simple basics are enough to create markers that look charming and hold up outdoors.
- Smooth river rocks or flat stones
- Outdoor acrylic paints or paint pens
- Small detail brushes for lettering and tiny designs
- Outdoor acrylic sealer in matte or gloss finish
- Pencil for lightly sketching designs first
- Palette or paper plate for mixing colours
Flat stones work best because they give you enough space for lettering and small illustrations. Decorative river rocks from garden centres are ideal, but collected stones can also work if they are cleaned thoroughly and allowed to dry completely.
Outdoor acrylic sealer is the supply worth prioritising. Paint creates the pretty part, but sealer helps protect your finished garden marker rocks from rain, soil, sunlight, and general outdoor mischief.
Step by Step Guide to Making Garden Marker Rocks

Creating painted garden marker rocks becomes much easier once you break the process into simple stages.
Start with clean, dry stones and work slowly. The most common mistakes usually come from rushing paint layers, skipping drying time, or sealing before the design is ready.
Step 1: Clean and Dry the Stones
Rinse each rock under water to remove soil and dust. Stubborn dirt may need a gentle scrub with an old toothbrush. Let the stones dry completely before painting so the paint can grip properly.
Step 2: Add a Base Coat if Needed
A base coat is optional, but it can help colours look brighter. White or cream backgrounds make floral designs pop, while black or dark gray stones create dramatic contrast for white lettering.
Step 3: Sketch the Design Lightly
Use pencil to lightly sketch the plant name, flowers, vegetables, leaves, or tiny decorative details. This helps with spacing and prevents the classic “ran out of room halfway through the word rosemary” situation.
Step 4: Paint the Main Design
Work from background to foreground when creating layered designs. Let each colour dry before adding details nearby, especially if you are painting small leaves, petals, insects, or lettering.
Step 5: Add Lettering
Plant names need to stay clear and readable. Block letters work well for vegetable garden markers, while softer handwritten styles look lovely in herb gardens and cottage style planters.
Step 6: Seal the Finished Rocks
Let the painted design dry overnight, then apply outdoor sealer in thin even coats. Two light coats are usually better than one heavy coat because they reduce drips and cloudiness.
Allow the sealed rocks to cure before placing them outside. Once dry, they are ready to tuck into herb pots, vegetable beds, flower borders, or wherever your garden needs a little handmade charm.
Design Tips for Beautiful Garden Markers
Small creative choices make a big difference in how painted garden marker rocks look once they are sitting among herbs, flowers, and soil.
The easiest way to make your markers look cohesive is to match them to your garden style. Cottage gardens suit whimsical flowers and woodland creatures. Modern planters look lovely with clean botanical sketches. Vegetable beds can handle rustic carrots, tomatoes, pumpkins, and cheerful farmhouse colour palettes.
- Choose colours that complement nearby plants
- Keep lettering large enough to read outdoors
- Leave space around the wording so the design can breathe
- Use tiny dots, leaves, stars, or hearts to fill awkward gaps
- Practise lettering on paper before painting the final stone
Soft neutrals like cream, gray, sage green, and warm brown blend beautifully into garden spaces. Brighter colours work well in flower beds where they echo surrounding blooms.
Most importantly, let the imperfections stay. Slightly uneven lettering and organic brush strokes are part of the charm. Handmade garden decor should look handmade, not like it came from a suspiciously perfect factory.
Making Garden Markers Last Through Seasons

Proper preparation and sealing help painted garden marker rocks withstand outdoor conditions throughout the year.
Outdoor acrylic sealer provides the main protection against rain damage. Without it, paint can fade, chip, or peel much faster, especially in exposed areas.
- Use two thin coats of outdoor sealer for better protection
- Place delicate markers in partly shaded areas when possible
- Avoid pressing painted rocks too deeply into wet soil
- Bring extra delicate designs indoors during harsh winter weather
- Touch up chips and reseal every year or two
A little annual maintenance keeps them looking lovely. Wipe away dirt gently in early spring, repair small chips if needed, and add a fresh coat of sealer when the finish starts looking tired.
Creative Variations Beyond Traditional Plant Markers
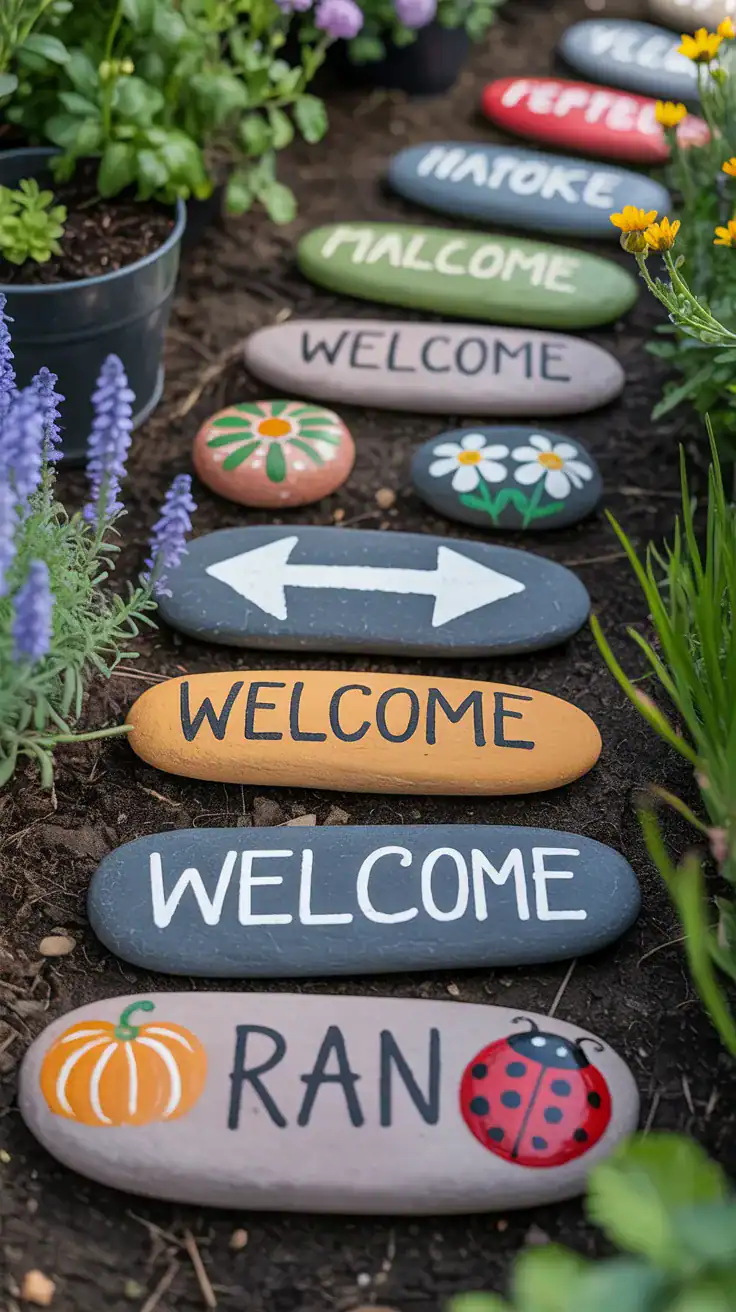
Painted rocks can do more in the garden than simply identify plants.
Once you have the basic technique down, you can use the same idea for pathway markers, seasonal decorations, quote rocks, and playful little garden accents.
- Pathway markers: Paint simple arrows or area names on larger flat stones and place them near path corners or garden gates.
- Quote rocks: Add short words like grow, bloom, breathe, welcome, or rest for seating areas and flower beds.
- Seasonal rocks: Paint pastel flowers in spring, bees in summer, pumpkins in autumn, and evergreen sprigs in winter.
- Children’s garden rocks: Simple ladybugs, caterpillars, suns, and flowers are fun, forgiving, and full of personality.
- House number stones: Larger flat rocks can become handmade curb appeal details near a front path, porch, or mailbox.
This is where painted garden marker rocks become more than labels. They turn into tiny decorative details that make the whole garden feel more personal.
Common Challenges When Painting Garden Markers
Understanding common painting problems helps you avoid frustration and get better results.
Most issues are easy to fix once you know what caused them. Usually, the villain is damp stone, rushed drying time, or paint applied with far too much enthusiasm.
- Paint peeling: This usually happens when stones are dirty, dusty, or damp before painting.
- Streaky coverage: Two thin coats usually look smoother than one thick coat.
- Smudged details: Let each layer dry before adding nearby lettering, leaves, dots, or outlines.
- Cracking sealer: Apply sealer in thin coats and only after the paint has fully dried.
- Unreadable lettering: Choose larger stones, sketch first, and keep plant names simple.
If a marker does not turn out perfectly, it is not a disaster. It is a rock. Paint over it, try again, and pretend the first version was merely a creative warm up.
Budget Friendly Ways to Create Garden Markers

Creating beautiful painted garden marker rocks does not require expensive supplies or advanced art skills.
You can collect stones from outdoor areas instead of buying decorative rocks, as long as collecting is allowed where you are. Smooth flat stones are best because they give you enough space for both lettering and small illustrations.
- Use leftover paint from previous craft projects
- Focus your budget on a good outdoor sealer
- Keep designs simple to reduce the number of supplies needed
- Use paint pens only for lettering and small details
- Make markers during quieter gardening months so they are ready for spring
Simple designs often look more stylish anyway. Clean lettering with one tiny leaf, flower, or vegetable illustration can be just as charming as a detailed painted scene.
Why Painted Garden Marker Rocks Work So Well
Painted garden marker rocks work so well because they combine creativity with practicality. They help organize gardens while adding warmth, texture, and personality that mass produced plastic markers simply cannot replicate.
The handmade quality creates a welcoming garden atmosphere. Each imperfect brush stroke quietly says that someone cared enough to make the space feel personal.
They are also durable when sealed properly. A well protected painted stone can last for several growing seasons, making it a lovely alternative to flimsy plant tags that fade, bend, or vanish into the soil.
Customization is another reason they work so beautifully. You can match your markers to a cottage garden, a modern herb planter, a colourful vegetable patch, or a whimsical flower bed.
The process itself is calming too. Painting tiny leaves, lettering herb names, and adding little decorative details gives your hands something gentle to do while your mind slows down a bit.
And honestly, there is something deeply satisfying about wandering into your garden and seeing tiny hand painted mushrooms labeling your rosemary instead of a faded plastic stick barely hanging on for dear life.
Final Thoughts on Painted Garden Marker Rocks
Painted garden marker rocks are one of those small projects that make a garden feel more personal almost instantly.
They are practical enough to be useful, creative enough to be enjoyable, and charming enough to make even a simple herb pot feel considered.
Start with a few smooth stones, a simple colour palette, and plant names you actually need to label. Keep the designs relaxed, let the imperfections show, and remember that handmade charm is the whole point.
Whether you paint minimalist herb markers, rustic vegetable stones, cottagecore florals, or tiny woodland scenes, these little garden labels bring a soft handmade touch to your outdoor space.
And if the lettering goes a bit crooked? Perfect. That just means your garden has personality.