
DIY Fire Pit Installation Guide – Quick & Easy Steps
If you’ve been thinking about adding a fire pit to your backyard, this is one of those projects that’s genuinely easier than it looks. With the right setup, you can build a simple, sturdy fire pit in a weekend, and completely change how your outdoor space feels.
This post includes affiliate links. If you make a purchase through them, I may earn a small commission at no extra cost to you. More details here.
This guide walks you through the exact steps, from choosing the right spot to stacking your final layer. No overcomplication, just a clear, practical approach that works.
Understanding the Basics Before You Start
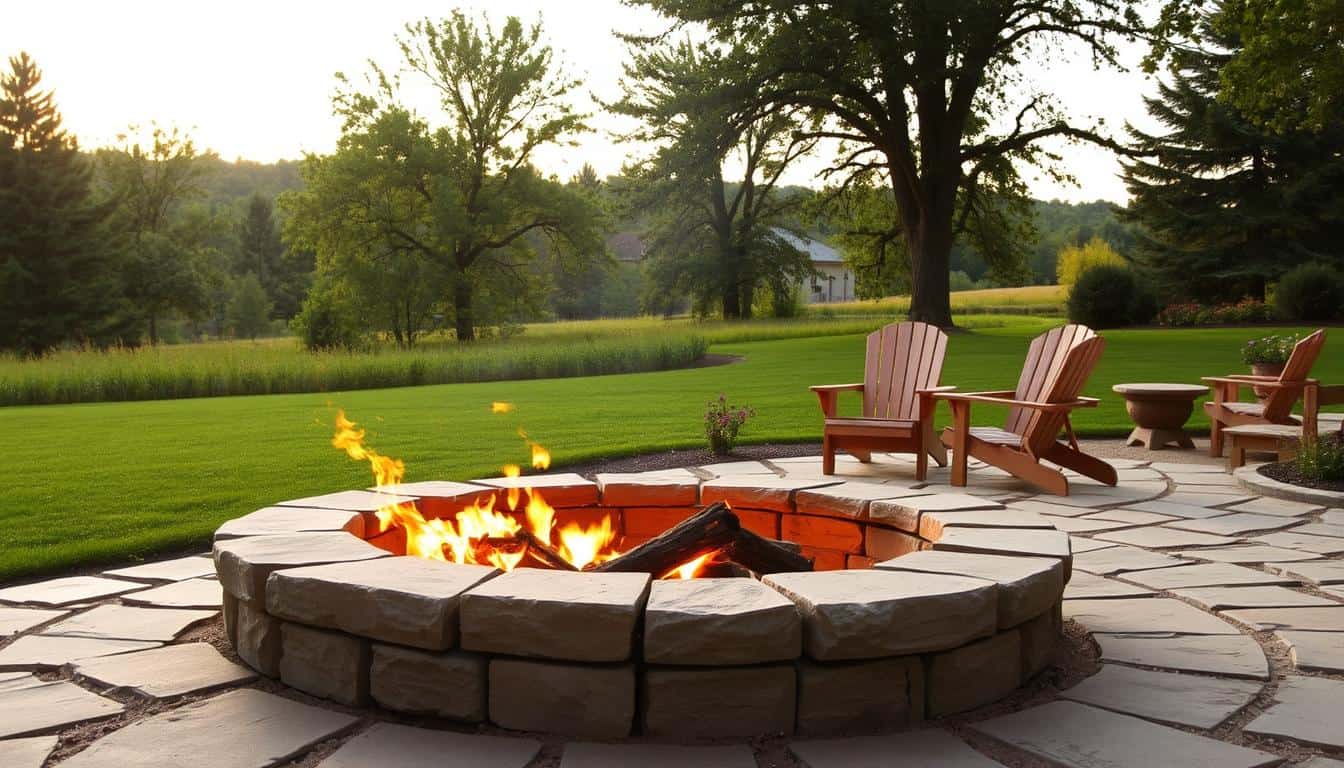
A fire pit adds warmth, atmosphere, and a natural gathering point to your backyard. But before you start digging, there are two things to get right: location and safety.
As a general rule, place your fire pit at least 10 feet away from buildings, fences, and trees. Always check local regulations first—this step saves a lot of hassle later.
Step 1: Choose the Right Location
Pick a flat, open area with enough space around it. This makes installation easier and keeps things safe once the fire pit is in use.
| Requirement | Guideline |
|---|---|
| Distance from structures | Minimum 10 feet |
| Clear space around pit | At least 6 feet |
| Overhead clearance | No low branches or coverings |
Tip: If the ground isn’t level now, it will only get harder later. Take a few extra minutes to choose a good spot.

Step 2: Mark and Prepare the Area
Mark out your fire pit shape using spray paint, string, or even a garden hose. A diameter of 3–4 feet works well for most spaces.
Remove grass, roots, and topsoil within the marked area. Dig down enough to allow for your base layer (around 5–6 inches).
Quick check: Make sure the base is as level as possible before moving on.

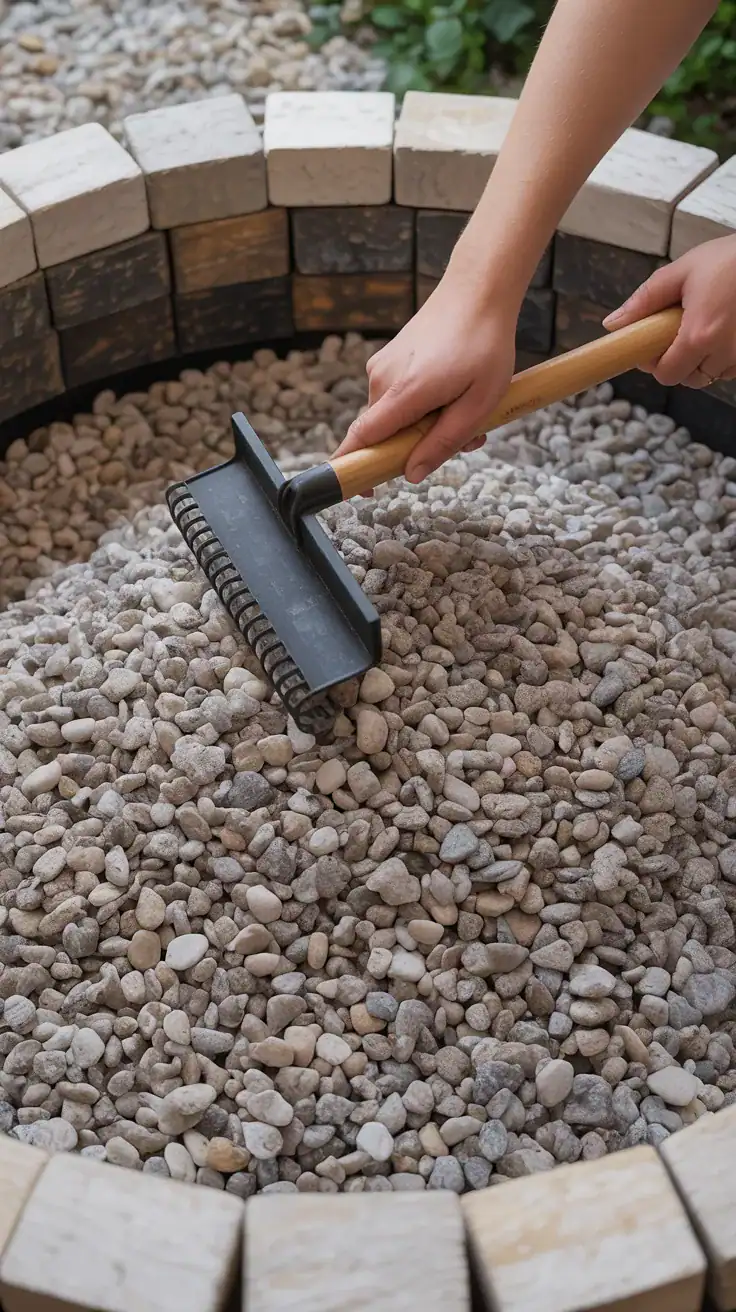
Step 3: Build a Solid Base
Fill the base with gravel (about 5 inches deep). Spread it evenly, then compact it firmly. This creates a stable foundation and allows for proper drainage.
This is the step most people rush, but it’s what keeps your fire pit from shifting over time.
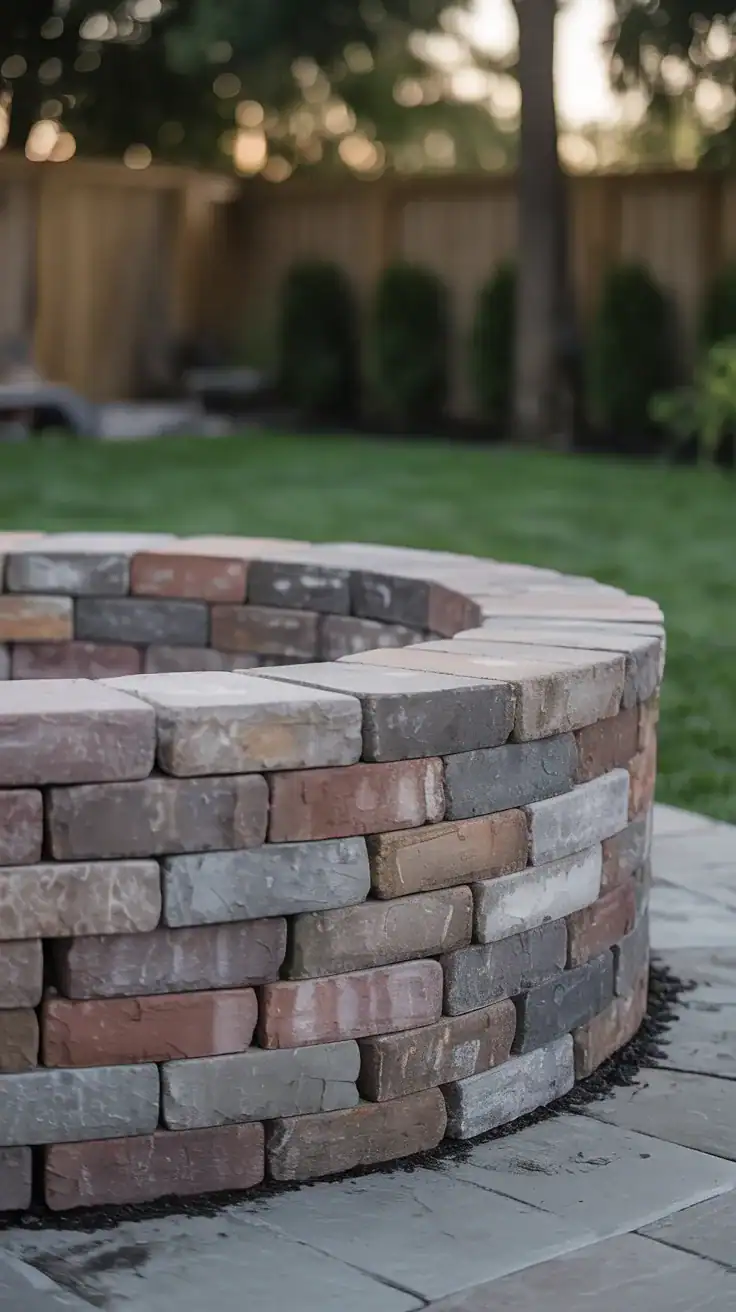
Step 4: Lay the First Row of Blocks
Place your first layer of stones or pavers directly onto the compacted gravel. Take your time here—this row sets the alignment for everything else.
Use a level to check each block, and adjust with a rubber mallet as needed.
Important: If this row isn’t level, the rest of the fire pit won’t be either.
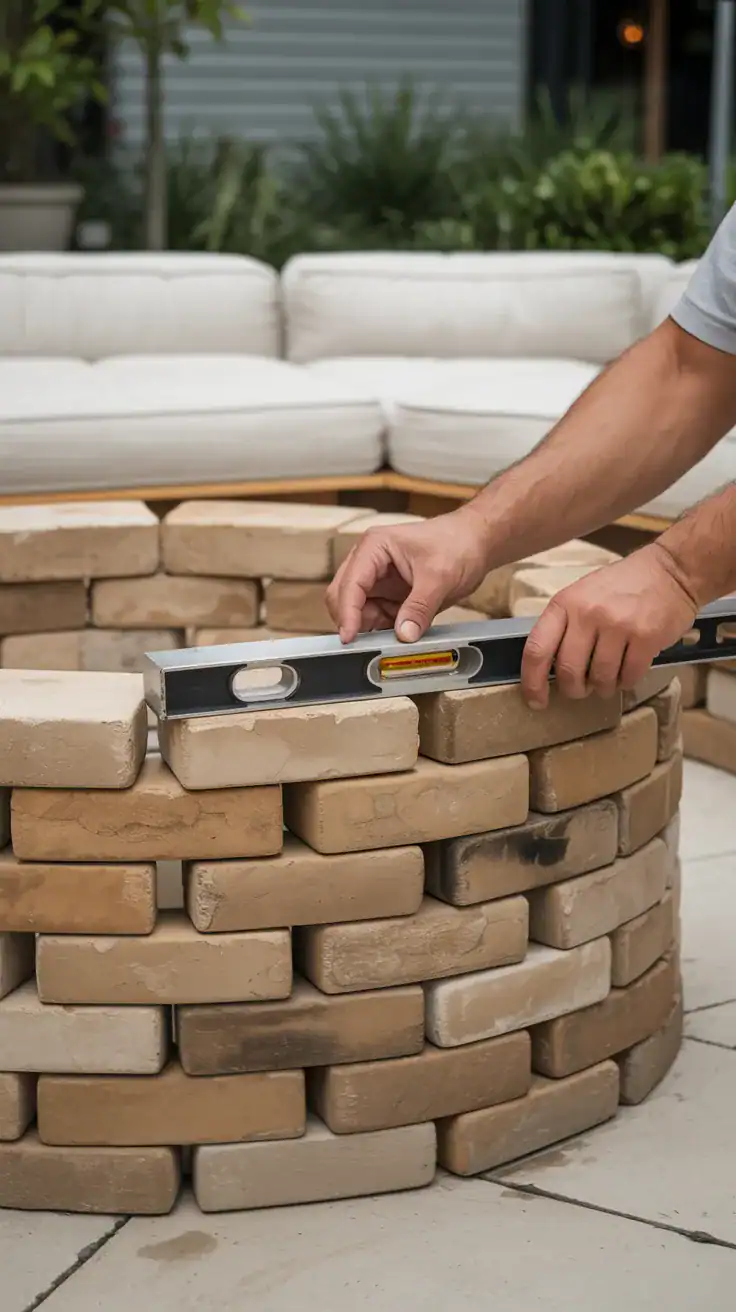
Step 5: Build Up the Walls
Stack additional layers of blocks, staggering the joints as you go. This improves both strength and appearance.
If needed, apply masonry adhesive between layers for extra stability. Most fire pits are 3–4 layers high.
Pause occasionally and step back—this helps you spot any uneven areas early.
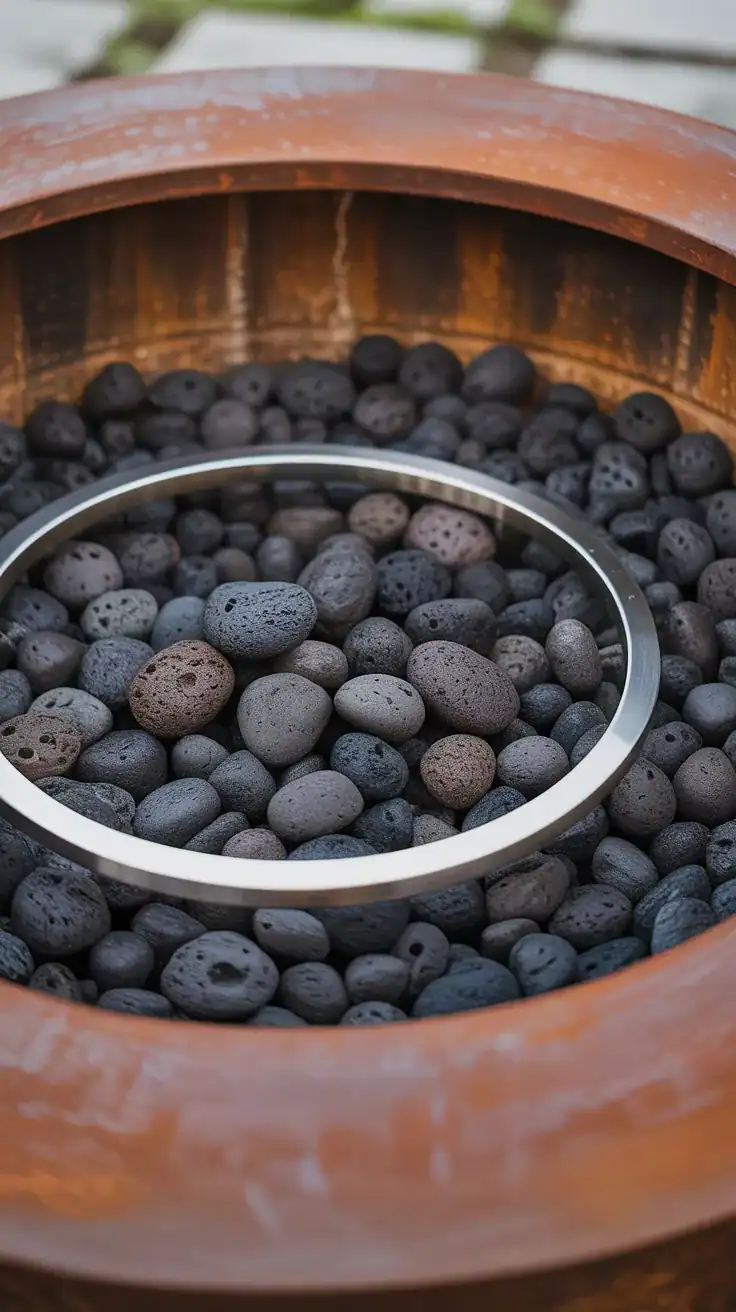
Step 6: Add the Interior Protection
To protect your fire pit from heat damage, place a metal fire ring inside or line the interior with fire bricks.
You can also add lava rocks or decorative stone for a finished look.
Step 7: Let Everything Set Before Use
If you’ve used adhesive, allow it to cure fully before lighting your first fire—usually around 24–48 hours, depending on the product.
Rushing this step can weaken the structure, so it’s worth the wait.
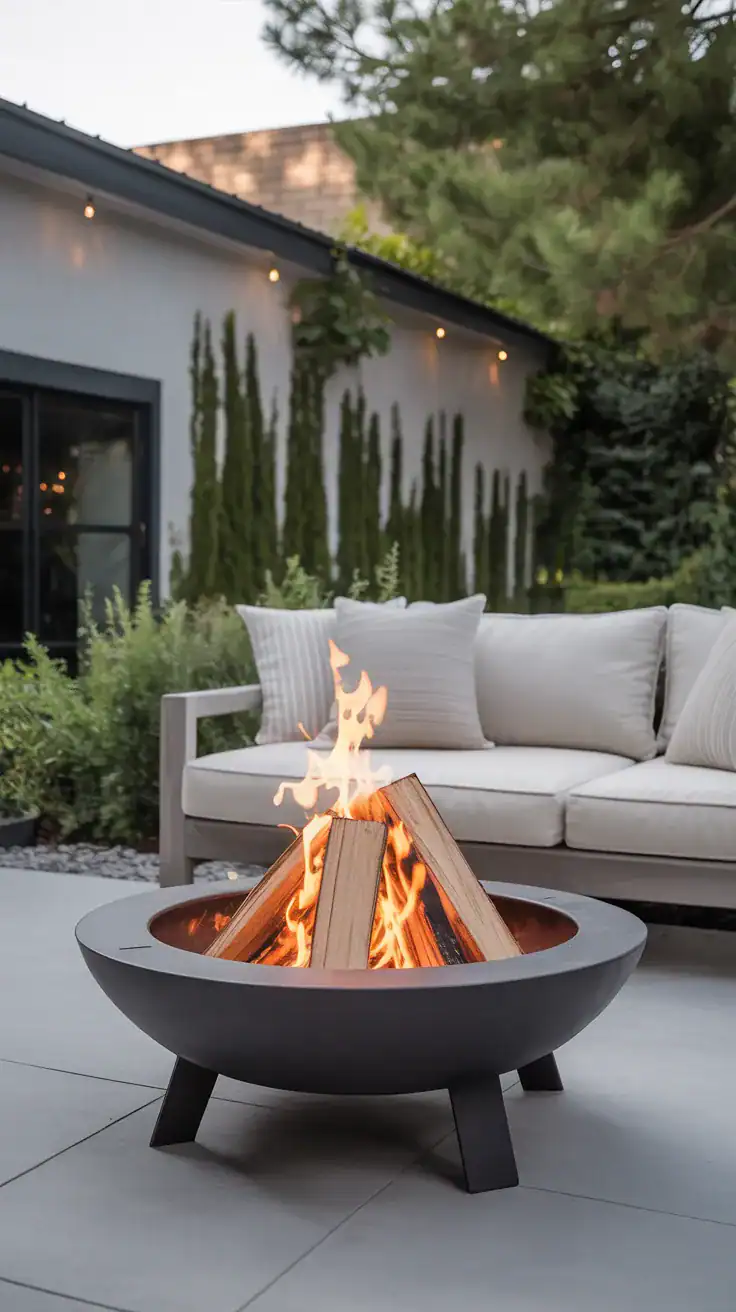
Step 8: Light Your First Fire Safely
Start with small kindling and gradually add larger logs. Keep water, sand, or a fire extinguisher nearby at all times.
- Never leave the fire unattended
- Keep the surrounding area clear
- Fully extinguish the fire after use

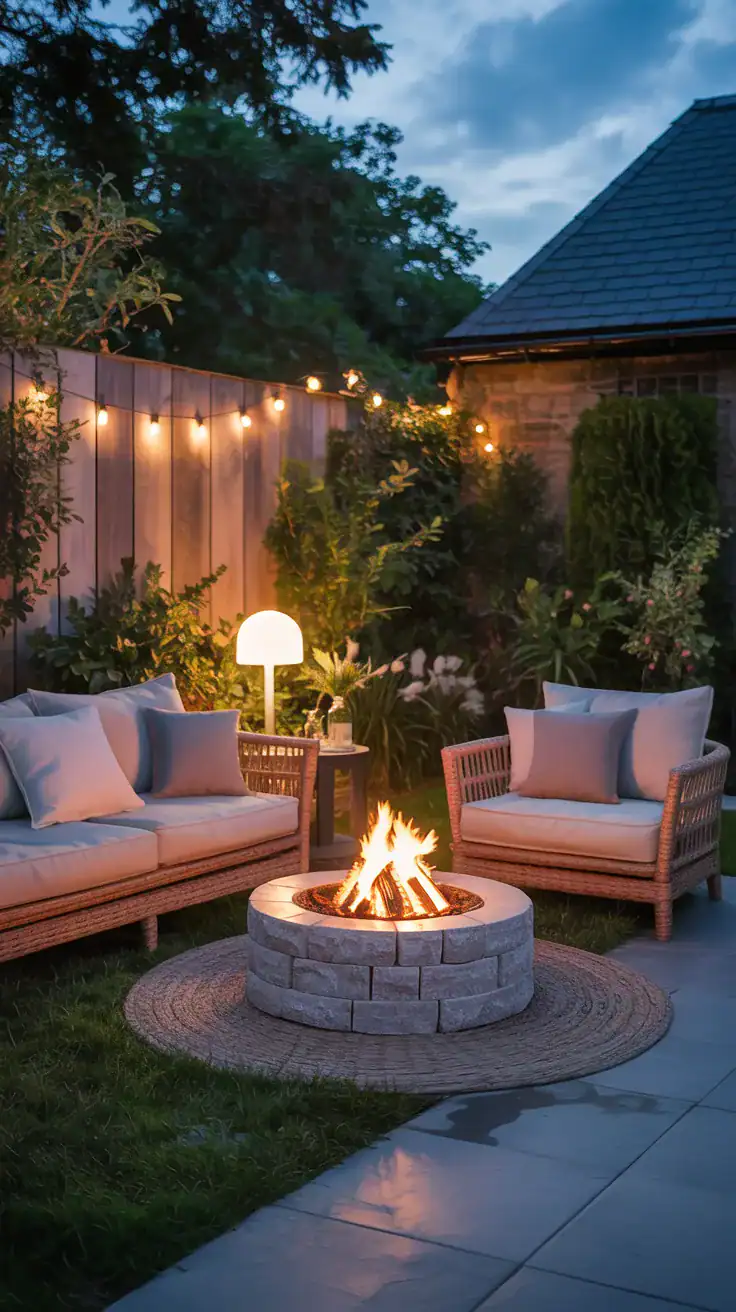
Step 9: Simple Maintenance to Keep It Looking Good
Once your fire pit is in place, maintenance is simple. Remove ash regularly, check for any loose blocks, and cover it when not in use to protect it from weather.
A little upkeep keeps your fire pit safe, clean, and ready whenever you want to use it.

Conclusion
Building a fire pit doesn’t have to be complicated. With a solid base, careful alignment, and a bit of patience, you can create a clean, durable setup that completely upgrades your backyard.
Take it one step at a time, don’t rush the foundation, and you’ll end up with a space that’s just as practical as it is inviting.
You Might Also Like
Shop DIY Fire Pit Essentials
The foundation of your DIY fire pit—choose sturdy, heat-friendly blocks that create a clean circular shape and hold up beautifully outdoors.
Shop on Amazon
Helps protect the inside of your fire pit from direct heat, extending the life of the structure while giving it a more finished look.
Shop on Amazon
A compacted gravel base helps with drainage and keeps your fire pit stable, which makes this one of the most important materials in the whole project.
Shop on Amazon
Essential tools for getting that first row of blocks straight and even—because a level base makes the entire fire pit easier to build and better to look at.
Shop on Amazon
A strong outdoor adhesive adds extra stability between layers of block, especially if you want your finished fire pit to feel solid and long-lasting.
Shop on Amazon
A simple cover helps keep your fire pit clean, dry, and ready to use, while protecting the finish from rain, ash buildup, and general weathering.
Shop on Amazon