Did you know 90% of homeowners think expensive-looking wall decor is out of their budget? Spoiler: it’s not. With a few clever hacks, you can turn basic supplies into jaw-dropping focal points for any room. Best part? No fancy skills required.
Whether you’re staring at a blank wall or refreshing old pieces, creating custom artwork is easier than you’d guess. Think textured spackle designs on canvas or reclaimed wood turned modern masterpieces. These projects adapt to any space – go big for drama or keep it cozy for smaller walls.
Your secret weapon? Embracing imperfections. Unlike store-bought options, handmade creations let you tweak colors, sizes, and styles to match your vibe perfectly. Mess up a brushstroke? Call it “abstract flair.” Wood grain uneven? That’s “rustic charm.”
Key Takeaways
- Transform basic materials like canvas and wood into high-end decor
- Customize sizes and colors to fit your exact space needs
- Embrace creative “mistakes” as intentional design features
- Use affordable tools like spackle or leftover photos for texture
- Refresh rooms faster than waiting for store shipments
Introduction to DIY Wall Art
What if your walls could tell your story instead of showing mass-produced prints? Custom creations beat store-bought every time – 78% of crafters report their handmade pieces get more compliments than anything they’ve purchased. The magic happens when basic supplies meet creative vision.

Why homemade beats high-end prices
Store galleries charge $300+ for statement pieces. Your version? Under $50 using canvas, scrap wood, or even thrifted frames. You control everything:
- Colors that perfectly match your rug or couch
- Textures from spackle strokes or fabric layers
- Sizes fitting awkward nooks standard art ignores
Your roadmap to gallery-ready results
Three steps separate blank walls from showstoppers. First, raid your garage for potential bases – old shelves become abstract sculptures. Next, play with mixed materials: acrylic pours over driftwood, or photo collages on foam board. Finally, edit like a pro: step back, adjust lighting, and tweak until it feels “complete.”
No art degree needed. That “oops” drip of paint? Keep it. Uneven stain? Call it organic variation. Your space gains character most designers can’t replicate.
Gathering Materials for Your Project
Ever wonder what separates basic crafts from pro-level pieces? It starts with smart material choices. You don’t need pricey supplies – hardware stores and craft shops hold everything required for gallery-quality results.

Essential Supplies and Budget-Friendly Finds
Grab these staples to begin any project:
- Blank canvases from Michaels’ clearance section (under $10)
- Basic acrylic paints – mix primary colors instead of buying every shade
- Drywall spackle for 3D textures (a $5 tub covers multiple pieces)
Check hardware stores for mis-tinted paint samples. These $3 pots provide premium finishes without the cost. Old shelves or pallet wood make perfect natural bases – sand them smooth for instant rustic charm.
Optional Tools and Decorative Extras
Elevate your work with these affordable add-ons:
- Grooved spatulas create professional ridges in spackle
- Plastic forks and knives help carve unique patterns
- Recycled wallpaper scraps add instant vintage flair
Sponge brushes blend colors seamlessly, while metallic wax highlights textures. Remember: thrift stores hide goldmines like ornate frames or fabric remnants. Your total cost stays under $30, yet the final product looks straight from a boutique.
Quality materials don’t mean expensive ones. With the right foundation, even simple supplies transform into conversation-starting features. Now let’s turn these finds into something extraordinary.
Planning and Designing Your Large Wall Art Piece
The secret to gallery-worthy walls isn’t just creativity – it’s math. Experts agree: measuring your space first prevents “too small” regrets. Start by taping newspaper cutouts to your wall to test proportions. If it feels off, it probably is.

Choosing the Perfect Size and Layout
Grab a tape measure and note your wall’s width and height. For balanced designs, aim for artwork that covers 50-75% of the available space. Overly tiny pieces get lost, while massive ones overwhelm. Pro tip: Order materials 10% larger than your sketch – trimming beats scrambling for extra supplies mid-project.
Sketch rough layouts using free grid apps or tracing paper. Mark where colors shift or textures peak. This roadmap prevents “blank canvas panic” and ensures your final piece complements furniture layouts. Love bold statements? Outline the wildest version first, then refine – planning lets you push boundaries without chaos.
Consider sightlines: Will viewers see it from a couch (eye-level) or hallway (angled)? Adjust sizing accordingly. Those 8×10 family photos? Map them as placeholders in your sketch before committing to canvas cuts. Time spent planning now means fewer “why’s it crooked?!” moments later.
Techniques to Create a Customized Look
Unlock the secret weapon every pro designer uses: layered textures. Whether working with fresh materials or repurposed finds, adding dimension transforms flat surfaces into focal points. Let’s explore two game-changing methods to elevate your creations.

Texturing with Spackle and Paint
Grab drywall spackle and a putty knife – this $5 combo creates museum-worthy depth. Spread thick globs for bold ridges or thin layers for subtle waves. Let it dry halfway, then carve swirls using a fork or comb. Pro tip: layer metallic paint over textured areas to catch light differently across your piece.
Messed up? No sweat. Smooth bumps with wet sandpaper or add more spackle to redirect your design. Try these finishes:
- Dust gold wax over white peaks for sunset-inspired warmth
- Drag a dry brush horizontally to emphasize horizontal grooves
- Press lace into wet spackle for delicate floral impressions
Using Recycled Materials and Wallpaper
That leftover wallpaper sample? Cut geometric shapes and decoupage them onto thrifted frames. Overlap patterns at angles for dynamic contrast. For wood pieces, sand edges to reveal raw layers beneath paint – instant vintage appeal.
Frame fabric scraps as minimalist art or wrap them around canvas edges. Bonus: repurpose old window screens as textured painting surfaces. The key? Let materials guide your design instead of forcing predetermined layouts.
Notice a coffee stain on that book page? Incorporate it as intentional distressing. These “flaws” become signature details that mass-produced prints can’t replicate. Your space gains authenticity with every imperfect brushstroke or uneven edge.
Create Luxe-Looking Wall Decor in 6 Simple Steps
Ready to turn everyday supplies into a showstopping masterpiece? Let’s dive in. This walkthrough combines time-tested techniques with pro shortcuts for results that’ll make guests ask, “Where’d you buy that?” Spoiler: your total cost stays under $35.

Step-by-Step Process from Start to Finish
- Prep your base
Sand wood or wipe canvas with a damp cloth. For frames, remove glass and backing. Check our favorite budget-friendly wall art projects for base ideas. - Apply texture magic
Spread spackle thickly using a putty knife. You’ve got 15 minutes before it hardens – carve swirls with forks or combs for organic patterns. Let dry overnight. - Spray & blend colors
Hold spray paint 12” away. Layer gold over navy, misting lightly where colors meet. Immediately dab with a dry cloth for seamless gradients. - Add metallic accents
Rub gold wax onto textured peaks using your finger. Focus on areas catching natural light for 3D drama. - Secure your creation
Staple canvas to stretcher bars or nail wood pieces to floating frames. Use felt pads on corners to protect walls. - Document your win
Snap progress photos under consistent lighting. These help replicate successes in future projects.
Pro tip: Mist spackle with water if it dries too fast. Want bolder hues? Mix acrylic paint into spackle before applying. Your piece evolves with each intentional “oops” – that drip down the side? Frame it as edgy asymmetry.
Tips for Achieving a Professional Finish on a Budget
Professional finishes aren’t about pricey tools – they’re about smart prep work. That $5 tube of spackle? It becomes your secret weapon when paired with these pro-approved methods. Let’s transform basic materials into pieces that scream “custom commissioned” (without the four-figure price tag).

Surface Preparation and Adherence Techniques
Skip this step and watch textures peel faster than cheap stickers. Proper prep makes colors pop and textures last for years:
- Wipe surfaces with a vinegar-water mix (1:3 ratio) using a lint-free cloth
- Lightly sand wood or canvas with 220-grit paper – creates “tooth” for better paint grip
- Brush on primer using leftover house paint thinned with water
For collage-style pieces, seal layers with Mod Podge instead of expensive decoupage glue. Press bubbles out with an old gift card. Pro tip: Use double-sided tape on frame backs for wobble-free wall mounting.
DIY Tricks for a Polished, Gallery-Worthy Look
Steal these designer shortcuts that cost less than a latte:
- Buff metallic wax onto edges with a sock for instant “aged bronze” effects
- Spritz water lightly before spray painting – creates organic mottled textures
- Frame fabric swatches with $1 thrifted frames painted matte black
Hide uneven edges using washi tape borders or rope trim from the craft bin. See a drip? Turn it into intentional “paint trails” with a thin brush and steady hand. Your secret? Viewers’ eyes follow bold colors first, flaws last.
Remember: Gallery lighting hides a multitude of sins. Angle a $15 clip light to highlight textures, not imperfections. Now step back – that’s not a craft project. It’s elevated home decor with your signature twist.
Displaying and Hanging Your Artwork
Your masterpiece deserves better than crooked nails and guesswork. Smart display techniques turn homemade creations into intentional design statements. Let’s explore ways to showcase your work like a seasoned curator.

No-Damage Hacks That Hold Weight
Heavy wood pieces? Try these secure solutions:
- French cleats cut from scrap wood – hides hardware while supporting 50+ lbs
- Leather straps nailed to pallet frames for industrial edge
- Adhesive picture ledges perfect for renters (holds up to 15 lbs)
Use wall anchors for concrete or plaster. Pro tip: Attach felt pads to frame corners – prevents wall scratches during adjustments.
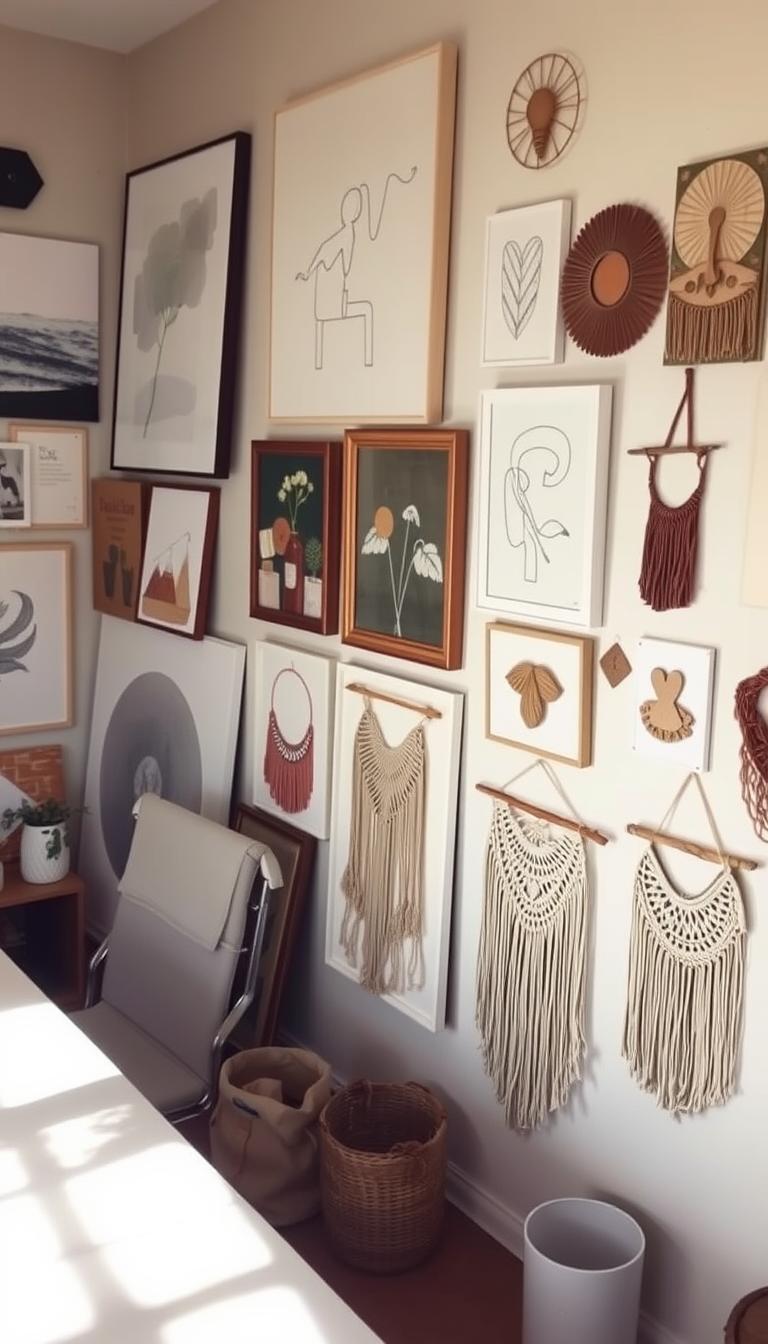
Gallery Walls That Flow Naturally
Arrange mismatched pieces like they’re meant to be together. Start by laying frames on the floor first. Keep 2-3” between similar-sized items, or cluster small prints around one large focal point.
Steal this trick from designers: cut newspaper templates to your art’s exact sizes. Tape them up to experiment before committing. Mix vertical and horizontal orientations for dynamic energy.
Elevate basic boards by mounting them on stained plywood backings. The unified base makes mixed-media pieces feel cohesive. Bonus: It hides uneven edges from your diy wall art projects.
Modifying Your Design for Your Space and Style
Great design bends instead of breaks. Your artwork should evolve as your life does – whether you’re downsizing, renting, or switching up your aesthetic. Let’s make your creations as flexible as your lifestyle.

Adapting Projects for Renters and Changing Spaces
Command strips and removable adhesive hooks are your new best friends. Create lightweight pieces using foam board instead of heavy wood. Try temporary wallpaper panels mounted on thin plywood – they pop on/off walls without damage.
Stuck with bland rental walls? Build a modular gallery using:
- Fabric panels stretched over PVC frames
- Interlocking canvas tiles that rearrange easily
- Magnetic photo displays using sheet metal and vintage magnets
Test layouts first with painter’s tape templates. This prevents “too big” disasters on narrow walls. For color schemes, stick to three neutral tones with one pop color – simplifies mixing pieces across rooms.
Adjustable frames let you swap artwork seasonally. Slide in autumn leaf collages or beach photos without rehanging hardware. Pro tip: Paint both sides of a wood panel for instant style changes – flip it when your mood shifts.
Your space might change, but your signature style doesn’t have to. View limitations as creative springboards. That awkward nook? Perfect for vertical fabric scrolls. Oddly shaped wall? Ideal for asymmetrical clay tile arrangements. Adaptability is the ultimate design hack.
Conclusion
Your walls just became your best design collaborators. From measuring spaces to mixing paint textures, you’ve got everything needed to craft showstopping budget-friendly decor. Remember: thrifted frames and fabric scraps hold the same potential as pricey store-bought pieces – especially when paired with bold creativity.
Think back to those spackle techniques or thrifted frames turned modern masterpieces. Your personal touch transforms basic supplies into gallery-worthy statements. Mix textures. Play with unexpected materials. Let that “imperfect” brushstroke become your signature style.
Share your finished projects below – we want to see how you’re redefining home decor on your terms. Got questions? Drop them in the comments. Your next stunning gallery wall starts with one brushstroke, one reclaimed wood slice, one bold experiment. Time to make those blank walls work for you.