Imagine a space where rustic charm meets everyday comfort—a room that feels both elegantly aged and refreshingly alive. This is the heart of French country design: a style rooted in simplicity, natural textures, and an effortless blend of old and new. Whether you’re renovating or refreshing, this approachable method lets you craft a kitchen that whispers “lived-in luxury” without demanding perfection.
At its core, this aesthetic celebrates imperfections. Think weathered woods, soft linen tones, and hand-painted ceramics that tell stories. But how do you translate that cozy elegance into your own home? Start by focusing on balance. Neutral palettes layered with earthy accents create warmth, while open shelving and vintage-inspired hardware add character.
This guide walks you through each phase—planning layouts, selecting materials, and adding those final touches that make a space uniquely yours. You’ll learn to mix practicality with beauty, like pairing durable stone countertops with handcrafted tiles. Most importantly, it’s about embracing the journey, not just the result.
Key Takeaways
- French country design prioritizes warmth and authenticity over rigid perfection.
- Neutral foundations paired with rustic textures create timeless appeal.
- Affordable updates (like hardware swaps) deliver significant visual impact.
- Vintage finds and natural materials enhance the lived-in charm.
- Practical layouts ensure beauty doesn’t sacrifice functionality.
Introduction to the French Cottage Kitchen Concept
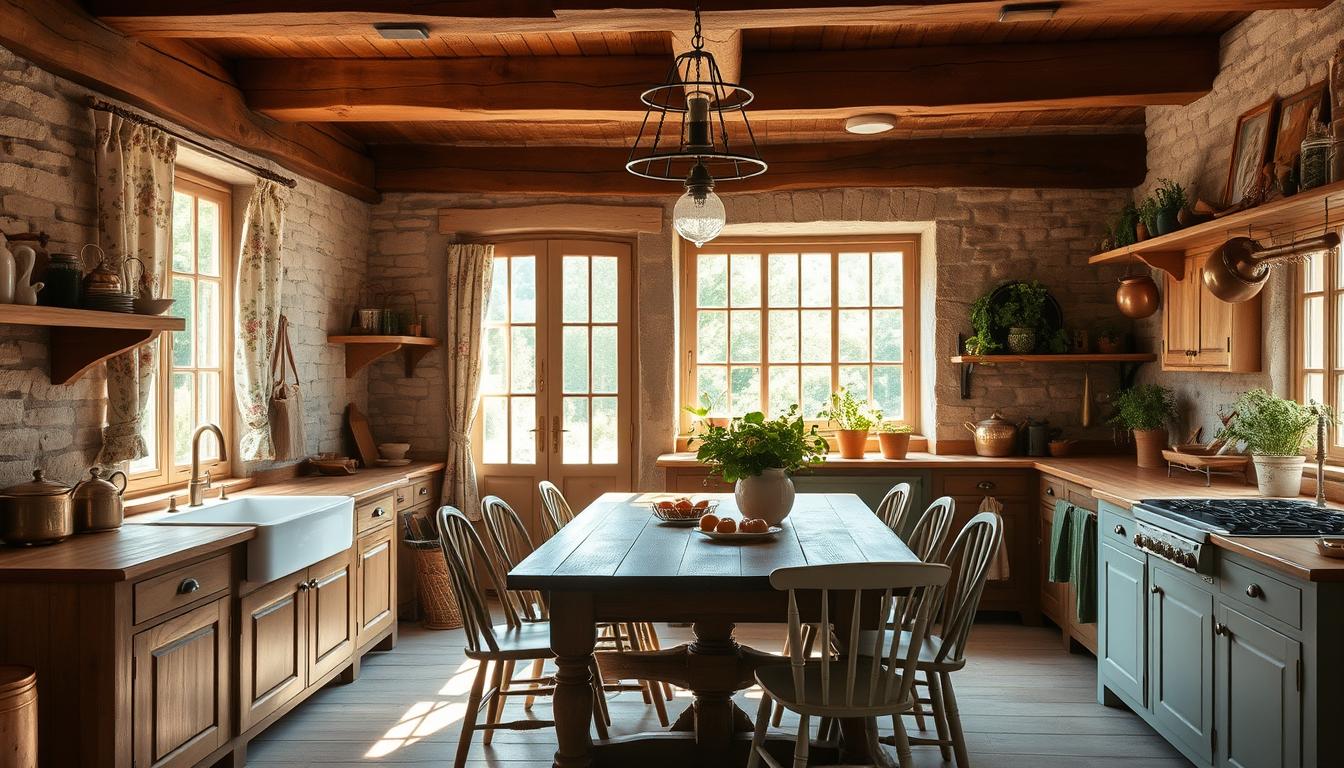
Picture a space where practicality and beauty coexist, wrapped in the warmth of rural traditions. The French country kitchen concept thrives on this balance—a marriage of rugged textures and refined details that feels both timeless and lived-in. Originating in 18th-century farmhouses, this style evolved from necessity. Farmers prioritized durable materials like stone floors and sturdy wooden tables, blending function with subtle artistry.
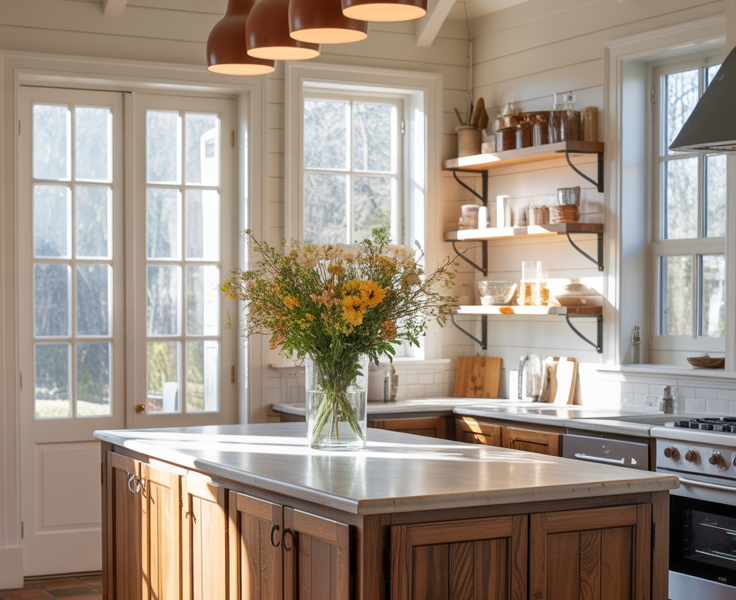
Today’s interpretations honor that heritage while adapting to modern lifestyles. Open shelving displays hand-glazed pottery, while weathered beams overhead echo rustic roots. Neutral colors—soft creams, sage greens, and faded blues—anchor the palette, letting natural materials shine. Antique brass handles or a vintage clock become quiet statements of character.
What makes this design endure? Its ability to tell a story. A chipped enamel pitcher or a well-loved oak countertop isn’t just decor—it’s evidence of life lived fully. As noted in French Country Kitchen Decor Ideas, this aesthetic “celebrates the beauty of imperfection,” inviting rooms to evolve organically over time.
You don’t need a countryside estate to capture this charm. Start with earthy tones and tactile fabrics, then layer in flea market finds or family heirlooms. The result? A kitchen that feels both curated and welcoming—a true heart of the home.
Understanding the French Cottage Kitchen Style
Step into a kitchen where timeworn elegance meets everyday ease—a space designed to feel collected rather than curated. The French country look thrives on this paradox, blending ornate carvings with practical surfaces. Think exposed ceiling beams paired with butcher-block counters, or hand-painted cabinets softened by linen-textured curtains.

Color plays a quiet yet vital role. Soft whites and muted greens form the base, while warm terracottas or faded blues add depth. As noted in design circles, “These hues mimic sun-washed Provençal landscapes, creating instant warmth.” Textured walls—think limewash or subtle plaster finishes—enhance this organic feel without overwhelming small spaces.
Furniture balances heritage charm with modern needs. A rustic farmhouse table might anchor the room, flanked by ladder-back chairs reupholstered in stain-resistant fabric. Open shelving showcases heirloom dishes alongside everyday stoneware, proving functionality and beauty coexist.
Natural materials anchor the style. Reclaimed wood floors develop character over time, while soapstone counters resist scratches better than polished granite. Even lighting choices matter: wrought-iron fixtures with Edison bulbs cast a glow that highlights rough-hewn textures.
To adapt this aesthetic, start with one vintage focal point—a weathered armoire repurposed as pantry storage. Layer in earthy accents through clay pots or woven baskets. Remember, authenticity comes from mixing eras: pair antique brass hardware with sleek, energy-efficient appliances for subtle contrast.
Planning Your DIY Project
Every successful transformation begins with a roadmap. Thoughtful preparation turns overwhelming tasks into achievable milestones, letting you focus on creativity rather than chaos. Start by mapping your vision against practical constraints—this balance ensures your space evolves smoothly from concept to reality.

Budget & Timeline Considerations
Allocate funds using the 70/30 rule: dedicate 70% to essential materials like countertops or cabinetry, reserving 30% for unexpected costs. Case studies show projects often exceed initial estimates by 15-20%, especially when restoring vintage elements. Pair this approach with a phased timeline—complete structural updates first, then decorative touches.
Break tasks into weekly segments. For example, focus on sourcing reclaimed wood for your kitchen island one week, then tackle hardware installation the next. Track progress using a visible calendar or app. As one homeowner noted, “Marking small wins kept motivation high during our six-month renovation.”
Setting Realistic Goals and Expectations
Identify non-negotiable features early—a farmhouse table for family gatherings or durable flooring for high traffic. Then layer in aspirational details like hand-painted tiles. Prioritize functionality: ensure cabinet layouts support workflow before adding open shelving for ceramic displays.
Schedule monthly check-ins to assess adjustments. If sourcing antique beams delays your ceiling update, shift focus to lighting fixtures temporarily. Flexibility preserves momentum while honoring the design’s authenticity. Remember, the goal isn’t perfection—it’s creating a space that ages gracefully with your life.
Essential Materials & Tools for Your Kitchen Makeover
Building a timeless space requires both practical tools and soulful materials. The right choices ensure your project balances durability with handcrafted character—qualities central to creating warmth that lasts. Start by prioritizing items that serve daily needs while reflecting artisanal traditions.

Tools Overview and Where to Purchase Them
Basic carpentry tools—like a miter saw, orbital sander, and drill—form your foundation. Add finishing essentials: angled paintbrushes for cabinetry details and a trowel for tile work. Many of these items are available at local hardware stores or through trusted online retailers like Home Depot’s Pro Speciality Tools section.
For vintage-inspired hardware or reclaimed beams, explore salvage yards or platforms like Etsy. One renovator shared: “Facebook Marketplace became my go-to for affordable, timeworn pieces that added instant history.”
Material Sourcing: Wood, Stone, and More
Reclaimed oak or pine brings natural texture to kitchen cabinets and open shelving. Local lumber mills often stock these materials at lower costs than big-box stores. For countertops, consider honed limestone or soapstone—their subtle imperfections align perfectly with rustic charm.
Decorative tiles anchor backsplashes with patterned flair. Seek out hand-painted designs from small batch artisans or browse Floor & Decor’s curated European collections. Pair these with wrought-iron lighting or linen curtains to weave cohesion through your space.
DIY French Cottage Kitchen: A Beginner’s Step-by-Step Guide
Transform your space through intentional stages rather than overnight overhauls. Begin by sketching your layout—mark appliance placements and traffic zones. This blueprint becomes your compass, ensuring each choice aligns with daily rhythms.

Start with foundational updates. Remove outdated hardware and sand cabinets using 120-grit paper. Apply milk paint in soft whites or sage greens for that country kitchen character. “Work in sections,” advises designer Marie Dubois. “Let brushstrokes show—they add handcrafted texture.”
Next, layer functional charm. Install open shelving using reclaimed wood planks cut to size. Display earthy stoneware and ironstone pitchers for visual warmth. For countertops, consider lime-washing existing surfaces or installing butcher block—both options balance affordability with rustic appeal.
Address lighting early. Swap fluorescent fixtures for wrought-iron pendant lights above islands. Use dimmer switches to create adaptable ambiance. These changes require basic electrical skills but yield dramatic transformations.
Finally, add lived-in details. Distress cabinet edges lightly with sandpaper. Style windowsills with potted herbs in terracotta pots. Remember, progress trumps perfection. As one homeowner shared: “Embracing slight imperfections made our kitchen feel authentically french—not staged.”
Stay motivated by celebrating small victories. Completed the backsplash? Brew tea in your new space. Finished painting? Host a casual lunch. These moments remind you why creating a welcoming french country kitchen matters—it becomes the heart of your home.
French Cottage Kitchen Color Palette & Design Inspiration
Color shapes the soul of a room, whispering stories of sunlit meadows and aged stone. In a French country kitchen, your palette becomes the foundation—a delicate dance between warmth and restraint. Start with soft neutrals like ivory or oatmeal for walls and cabinetry. These hues act as a canvas, letting bolder accents shine without overwhelming.

Subtle pastels add depth. Think faded blues reminiscent of Provençal shutters or sage greens echoing herb gardens. As noted in the French Country Color Palette guide, “Earth tones should feel sun-bleached, never harsh.” Pair these with warm terracotta tiles or linen textiles to balance rustic texture with airy lightness.
Apply colors strategically. Use muted blues on lower cabinets to ground the space, while keeping upper walls creamy to amplify natural light. Open shelving? Style it with clay pots in earthy reds or ironstone pitchers in soft grays. One renovated farmhouse in Normandy layered buttery yellows with slate countertops—proof that contrast creates harmony.
Light plays curator. North-facing rooms benefit from warm ivories to counter gray undertones. South-facing spaces? Cooler blues prevent glare while maintaining freshness. Remember, your palette should evolve with the sun’s path, casting new shadows and highlights daily.
Personalize through accents. A hand-painted tile backsplash in cornflower blue or a vintage rug with ochre threads adds character. Like a well-loved recipe, your kitchen’s color story gains richness when layered slowly—one intentional stroke at a time.
Selecting the Perfect Kitchen Cabinets for a Country Look
Cabinetry bridges the gap between utility and artistry in your space. The right choices honor heritage while accommodating modern needs—think solid wood frames with soft-close hinges. Start by assessing your room’s proportions. Floor-to-ceiling units maximize storage in compact areas, while glass-front upper cabinets maintain airiness.
Traditional vs. Modern Cabinetry Options
Traditional styles lean into craftsmanship details like raised panel doors or hand-carved corbels. Reclaimed oak or pine brings natural grain variations that age gracefully. Modern interpretations simplify lines but retain warmth through matte finishes or integrated handles.
A Vermont farmhouse renovation showcases this balance. Shaker-style base cabinets in muted gray provide clean lines, while open shelving above displays heirloom stoneware. This mix keeps the country look grounded yet functional.
Choosing Hardware and Finishing Touches
Hardware acts as jewelry for your cabinets. Aged brass pulls or knobs add patina without overwhelming. For a cohesive feel, match finishes to other metallic accents in the room—like wrought-iron light fixtures or copper pots.
Consider mixing knob sizes on upper and lower units for visual interest. A recent design project paired petite brass knobs on glass-front uppers with substantial cup pulls on base cabinets. This layered approach ties storage solutions to the overall decor narrative.
Remember to harmonize cabinet tones with existing furniture. If your farmhouse table has honey-toned legs, echo that warmth in your wood stains. Quality kitchen cabinets become both workhorses and storytellers, blending daily use with enduring charm.
Incorporating Rustic & Vintage Accents
Rustic charm lives in the details—those imperfect pieces that whisper stories of generations past. Integrating vintage accents isn’t about filling shelves with antiques. It’s curating moments that ground your space in authenticity. A chipped enamel colander becomes a fruit bowl. An heirloom breadboard leans against hand-painted tiles. These choices transform sterile rooms into spaces rich with soul.

Start by selecting items that blend purpose with personality. Hunt for:
- Ironstone pitchers with subtle cracks
- Reclaimed wood cutting boards
- Woven baskets for pantry storage
Display these finds intentionally. Group mismatched ceramic crocks near the stove for utensil storage. Hang a weathered ladder as open shelving for linens. As one designer notes, “The magic happens when objects look collected, not staged.”
Balance is key. Pair a sleek stainless steel range with a rustic hutch displaying hand-thrown pottery. Use modern glass jars to store dried herbs, then place them on an antique zinc tray. This mix creates depth while keeping the room functional.
Consider scale when placing country-inspired decor. A large farmhouse table anchors the room, while small iron hooks by the window hold herb-drying bundles. Every piece should feel both useful and meaningful—like a well-worn cast-iron skillet left artfully on the stove.
Lightly layer textures through linen tea towels or a braided jute rug. These subtle touches soften the space without overwhelming it. Remember, your kitchen’s character grows over time. Let each addition reflect your journey toward warmth and authenticity.
Lighting Ideas for a Cozy Ambiance
Light shapes mood as much as function—crafting shadows that dance across textured walls and warm metals that glow at dusk. In rustic spaces, illumination becomes an art form. Start by layering three types: ambient (general), task (focused), and accent (decorative). This approach adds depth while ensuring every corner serves a purpose.

Choosing the Right Fixtures for Warmth
Wrought-iron chandeliers with candle-style bulbs offer timeless charm. Their soft light mimics flickering flames, casting gentle patterns on stone backsplashes. Pair these with copper pendant lights above islands—their rosy hue amplifies warmth while complementing earthy tones.
Consider these elements for balance:
- Matte black sconces with fabric shades near seating areas
- Recessed lighting along countertops for meal prep clarity
- Vintage-inspired lanterns flanking the farmhouse sink
Metallic finishes act as quiet harmonizers. Aged brass drawer pulls echo copper fixtures, creating visual continuity. Stick to one color family for metals to avoid clutter. As designer Lila Monroe advises, “Let textures vary, but keep finishes cohesive—it grounds the design.”
Dimmer switches prove essential. They let you adjust brightness for morning coffee rituals or evening gatherings. For open shelves, install discreet LED strips to highlight ceramic collections without glare. Remember: layered light transforms utilitarian spaces into soulful retreats.
Integrating Modern Appliances into a Cottage Kitchen
Modern conveniences can coexist with heritage charm when approached thoughtfully. The key lies in selecting appliances that honor your space’s country kitchen roots while delivering today’s efficiency. Start by choosing panel-ready models—refrigerators or dishwashers hidden behind custom cabinetry fronts. These blend seamlessly with vintage-inspired storage while offering smart features.

Case studies reveal clever integrations. A renovated farmhouse in Napa Valley paired a pro-style range with a reclaimed wood range hood. Stainless steel appliances were softened with open shelving displaying ironstone bowls. As designer Claire Sutton notes, “Technology should serve the narrative, not disrupt it.”
Focus on subtle upgrades. Opt for induction cooktops with analog-style knobs instead of touchscreens. Choose integrated coffee stations disguised as freestanding hutches. Even smart home systems can hide behind distressed cabinet panels.
Balance remains essential. Let your french country kitchen’s patina shine by anchoring modern elements with natural materials. A farmhouse sink pairs well with a water filtration system tucked below. Exposed beams draw attention upward, away from under-counter appliances.
Remember: modern touches should enhance daily life without demanding attention. Your home gains functionality while preserving the relaxed elegance that defines this timeless style.
Blending Old-World Charm with Contemporary Design Elements
The magic happens when eras converse—where weathered patinas meet sleek lines in harmonious contrast. To create a kitchen that honors tradition while embracing modern life, think of your space as a curated gallery. Balance becomes your guiding principle, letting each piece contribute to a story that feels both timeless and fresh.

Mixing Vintage Inspirations with Modern Trends
Start with foundational colors that bridge generations. Warm ivory walls paired with matte black fixtures create a neutral stage. Layer in vintage accents like an antique bread box or enamelware, then offset them with clean-lined bar stools. As designer Eleanor Whitmore notes, “Contrast prevents nostalgia from tipping into theme-park territory.”
Texture blending works wonders. Pair a reclaimed wood island with quartz countertops—their smooth surface modernizes rustic grain. Open shelving displaying heirloom dishes gains edge when lit by minimalist LED strips. This interplay of rough and refined keeps the country soul intact while nodding to contemporary tastes.
Choose one statement piece to anchor each zone. A farmhouse sink with modern pull-down hardware becomes a functional centerpiece. Nearby, a sleek coffee machine sits atop a distressed hutch filled with ironstone pitchers. These intentional pairings prevent visual chaos while celebrating duality.
Remember: cohesion thrives in repetition. Echo cabinet hardware finishes in lighting fixtures or drawer pulls. Use earthy colors from vintage rugs as inspiration for dish towels or tile grout. Your kitchen becomes a dialogue between eras—a living space that respects history without replicating it.
Step-by-Step Kitchen Renovation Process
Renovating your cooking space becomes manageable when approached as a series of intentional phases. By dividing tasks into preparation and action stages, you maintain clarity while honoring the room’s functional needs. This methodical rhythm helps avoid overwhelm and ensures each choice aligns with your vision.
Preparation Phase: Clearing and Planning
Begin by emptying cabinets and countertops—this reveals hidden layout opportunities. Protect existing floors with rosin paper and cover appliances in plastic sheeting. Create a detailed timeline that accounts for drying periods between tasks like painting and tile setting.
Gather materials upfront to prevent delays. Label boxes by zone (utensils, pantry items) for efficient post-renovation organization. One homeowner shared, “Sorting as we packed cut unpacking time by half.”
Implementation & Finishing Touches
Start with structural updates: install shelving, replace cabinet doors, or lay flooring. Apply paint in thin coats, sanding lightly between layers for a handcrafted finish. Position lighting fixtures before finalizing decor to assess shadow patterns.
Final details elevate the design:
- Align drawer pulls at consistent heights
- Style open shelves with varying heights of jars and bowls
- Add woven runners to high-traffic areas
Schedule buffer days between major tasks. A three-week project might allocate five days for demolition/prep, ten for installations, and three for styling. This pacing reduces rushed decisions and lets the space evolve organically.
Expert Tips and Tricks for DIY Success
Navigating a renovation requires equal parts vision and vigilance—a balance of creative ambition and practical wisdom. Even seasoned enthusiasts encounter surprises, but thoughtful preparation helps you sidestep common pitfalls while maintaining momentum.
Avoiding Common Mistakes
Measure twice, cut once applies beyond carpentry. Rushed planning often leads to mismatched proportions or workflow bottlenecks. One designer notes, “Clients forget to mockup layouts with painter’s tape first—it reveals traffic flow issues instantly.” Prevent budget overruns by allocating 10% for unforeseen costs like plumbing updates behind walls.
Watch material compatibility. Limewash requires porous surfaces—applying it over glossy paint causes peeling. Test finishes on sample boards under different lighting before committing.
Time-Saving Techniques and Pro Insights
Batch similar tasks. Sand all cabinet doors in one session rather than switching between tools. Use laser levels for quick alignment of shelves or tile patterns. Pre-cut materials offsite to minimize dust exposure.
Invest in multitasking tools. A oscillating tool handles detail sanding, grout removal, and trim cuts. For finishes, chalk paint often skips priming—ideal for quick cabinet updates.
Stay adaptable. When sourcing vintage hardware takes longer than expected, focus on painting walls instead. As contractor Luis Rivera advises, “Progress compounds when you work with delays, not against them.” Celebrate small wins—hung cabinets or a functioning sink—to sustain motivation through longer projects.
Real-Life Inspiration and Case Studies
True transformation often starts with a vision made tangible through perseverance. Across homes nationwide, thoughtful renovations prove that even dated spaces can become soulful retreats. Let’s explore how real families reimagined their kitchens into living testaments of craftsmanship and care.
Stories of Renewal
A Vermont farmhouse kitchen once trapped in the 1980s now breathes rustic elegance. The owners replaced laminate countertops with reclaimed oak and painted walls in muted olive. Open shelving displays ironstone platters found at estate sales, while a salvaged barn door conceals modern appliances. “We kept the original footprint but added character through texture,” they shared.
In Texas, a 1950s ranch underwent a country revival. Dark cabinets were lightened with chalk paint, and pendant lights with linen shades warm the breakfast nook. The layout shifted to include a freestanding island topped with local limestone—now the home’s gathering hub.
“Mixing thrifted stools with new hardware made the project affordable yet personal.”
These projects highlight three truths:
- Layout adjustments enhance flow without expanding square footage
- Vintage furniture pieces ground modern conveniences
- Neutral backdrops let collected items shine
One Georgia couple transformed their space over weekends using online inspiration. They limewashed brick, added floating walnut shelves, and repurposed an heirloom hutch as a coffee station. Their journey shows that gradual changes compound into striking results.
Whether reviving a rural farmhouse or a suburban kitchen, these country-inspired makeovers share a common thread: intentionality outweighs budget. As you plan, remember—every scratch on a thrifted table or irregular tile pattern adds to your home’s authentic narrative.
Conclusion
Your journey to crafting a space steeped in warmth and history begins with small, intentional choices. Through careful planning and thoughtful layering, even modest updates can evoke the effortless elegance of French country design. Remember: the goal isn’t flawlessness—it’s creating a room that ages gracefully alongside your life.
This guide has shown how neutral colors and natural textures form the foundation. Reclaimed woods, earthy ceramics, and strategic lighting transform sterile areas into inviting hubs. By blending modern conveniences with vintage character, you achieve balance without sacrificing comfort.
Today marks the perfect moment to start. Whether refreshing cabinet finishes or styling open shelves, each step brings you closer to a kitchen that feels authentically yours. Share your progress with fellow enthusiasts—their stories might spark your next inspired tweak.
As time unfolds, your space will gather its own patina. A chipped pitcher here, a sun-faded linen there—these become threads in your home’s unique tapestry. Trust the process, celebrate imperfections, and let every choice reflect the quiet joy of living well.