
Castor Oil Lip Balm Recipe for Dry Lips
Dry, cracked lips are annoying at best and painful at worst. This simple castor oil lip balm recipe is an easy, natural fix—no long ingredient list, no fancy tools, and no mystery additives. Just a deeply nourishing balm you can make in minutes and keep reaching for all day.
This post includes affiliate links. If you make a purchase through them, I may earn a small commission at no extra cost to you. More details here.
Castor oil is the star here. It’s thick, glossy, and incredibly hydrating, which makes it perfect for sealing in moisture and repairing dry, flaky lips. Unlike many commercial products that provide temporary relief but ultimately dry your lips further, this homemade remedy addresses the root cause of lip dryness.
Why Castor Oil Works So Well for Lips

Castor oil isn’t just trendy—it’s practical. Its unique composition makes it particularly effective for lip care. Composed mostly of ricinoleic acid (about 75%), castor oil offers benefits that few other carrier oils can match.
Why castor oil is perfect for your lips:
- Forms a protective barrier that locks in moisture
- Naturally glossy without feeling sticky
- Helps soothe cracked or irritated lips with anti-inflammatory properties
- Provides long-lasting hydration (fewer reapplications needed)
- Rich in fatty acids that nourish and repair delicate lip tissue
When paired with beeswax or a plant-based alternative, castor oil creates a balm that stays put and actually works. The beeswax helps the formula adhere to your lips while the castor oil penetrates deeply to provide lasting moisture.
Simple Castor Oil Lip Balm Recipe
This recipe makes about 2–3 small tins or tubes, perfect for keeping one at home, one in your bag, and maybe sharing one with a friend who also suffers from dry lips.
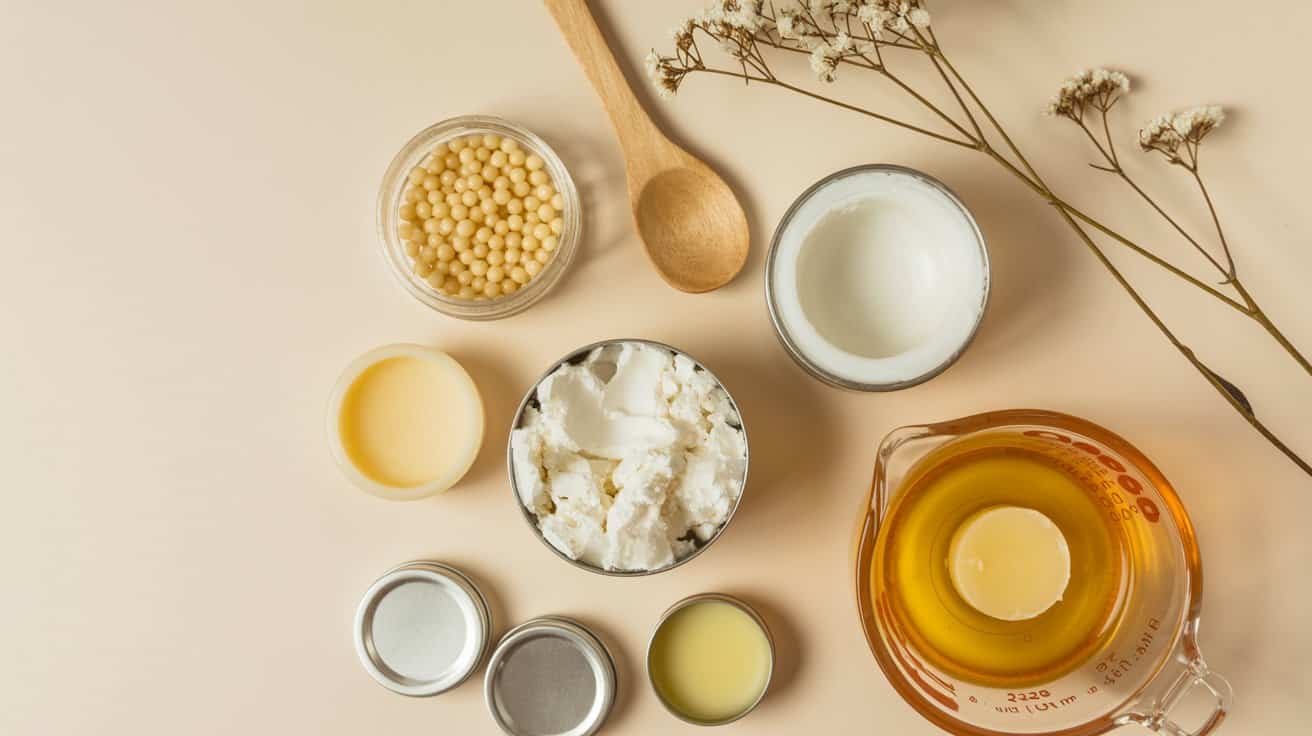
What You’ll Need

- 1 tablespoon castor oil
- 1 tablespoon beeswax pellets
- ½ tablespoon shea butter (or cocoa butter)
- Optional: 3–5 drops vitamin E oil
- Optional: 1–2 drops essential oil (peppermint or vanilla work well)
Quality Ingredients Matter
For best results, use organic, cold-pressed castor oil and unrefined shea butter. Your lips will thank you!
How to Make It

- Add the beeswax, castor oil, and shea butter to a heat-safe bowl or jar.
- Place the bowl over a pan of gently simmering water (double boiler style).
- Stir until everything is fully melted and smooth.
- Remove from heat and add vitamin E or essential oils if using.
- Carefully pour into lip balm tins or tubes.
- Let it cool and set for about 30 minutes.
That’s it—no curing time, no complicated steps. Just a simple process that yields professional-quality lip balm in minutes. The mixture will harden as it cools, creating that perfect balm consistency.

“I’ve tried dozens of commercial lip balms, but nothing works as well as my homemade castor oil version. It’s the only thing that truly heals my chronically dry lips.”
— Sarah, DIY skincare enthusiast
How to Use It for Best Results

While this castor oil lip balm is simple to use, there are a few tips that can help you get the most benefit from your homemade creation:
- Apply before bed as an overnight lip mask for intensive repair
- Use sparingly during the day (a little goes a long way)
- Reapply after eating or drinking for extra protection
- Great for cold weather, wind, or heated indoor air when lips are most vulnerable
- Gently exfoliate lips with a soft toothbrush before application for better absorption
For severely cracked lips, apply a thicker layer before bed and let the healing properties work overnight. You’ll wake up to noticeably softer, more hydrated lips.
Customization Ideas

Want to tweak the recipe to suit your preferences? Here are some simple modifications you can make:
Texture Adjustments
- Softer balm: Reduce beeswax slightly (¾ tablespoon instead of 1)
- Firmer balm: Add a few more beeswax pellets (up to 1¼ tablespoon)
- Extra shine: Add ½ teaspoon more castor oil
- More moisturizing: Increase shea butter to 1 tablespoon
Flavor and Color Options
- Tinted balm: Melt in a tiny piece of natural lipstick or mica powder
- Vanilla flavor: Add ¼ teaspoon vanilla extract
- Cooling effect: 1-2 drops of peppermint essential oil
- Healing boost: Add 2-3 drops of lavender essential oil
Pro Tip: If you’re using essential oils, be careful not to add too much. Lips are sensitive, and too much essential oil can cause irritation. Start with just 1 drop and increase if needed.
Vegan Alternative

If you prefer a plant-based option, you can easily adapt this recipe by substituting the beeswax with candelilla wax. Candelilla wax is harder than beeswax, so you’ll need to adjust the amount.
Vegan Castor Oil Lip Balm Recipe:
- 1 tablespoon castor oil
- ½ tablespoon candelilla wax (it’s stronger than beeswax, so use half the amount)
- ½ tablespoon shea butter or mango butter
- Optional: 3-5 drops vitamin E oil
- Optional: 1-2 drops essential oil of choice
Follow the same melting and mixing instructions as the original recipe. The finished product will have the same moisturizing properties while remaining completely plant-based.
Storage and Shelf Life

Your homemade castor oil lip balm will last longer if stored properly. Here’s what you need to know:
- Store in a cool, dry place away from direct sunlight
- Properly stored, your lip balm should last 6-12 months
- Adding vitamin E oil (as suggested in the recipe) acts as a natural preservative and extends shelf life
- If the balm starts to smell rancid or changes color significantly, it’s time to make a fresh batch
- For travel, choose tubes over tins to prevent melting in hot weather
If you have any allergies to the ingredients, please test a small amount on your wrist before applying to your lips. Discontinue use if irritation occurs.
Why Homemade Lip Balm Beats Store-Bought

Homemade Castor Oil Lip Balm
- Contains only ingredients you choose and can pronounce
- No artificial preservatives, colors, or fragrances
- Customizable to your exact preferences
- More economical in the long run
- Environmentally friendly (especially with reusable containers)
- Focuses on actual moisture and protection
Commercial Lip Balms
- Often contain petroleum-based ingredients
- May include drying agents that create dependency
- Artificial fragrances can irritate sensitive lips
- Limited customization options
- More expensive over time
- Often rely on fillers that feel good briefly but dry lips out
Many commercial lip balms rely on ingredients that provide temporary relief but can actually make your lips more dependent on the product over time. By making your own castor oil lip balm, you’re creating a product that genuinely nourishes and protects your lips.
Troubleshooting Your Lip Balm

Even with a simple recipe, you might encounter a few issues. Here’s how to fix the most common problems:
| Problem | Cause | Solution |
| Lip balm too hard | Too much beeswax | Remelt and add more castor oil (¼ tsp at a time) |
| Lip balm too soft | Not enough beeswax | Remelt and add more beeswax (small amount at a time) |
| Grainy texture | Shea butter crystallized | Remelt completely and cool more slowly |
| Balm separating | Insufficient mixing | Remelt and stir thoroughly before pouring |
| Essential oil scent faded | Added oils before mixture cooled slightly | Add essential oils when mixture is still liquid but not hot |
Remember that making your own lip balm involves some experimentation. Don’t be afraid to remelt and adjust until you get the perfect consistency for your needs.
Final Thought

If your lips constantly feel dry no matter how much commercial balm you apply, switching to a richer oil like castor oil can make a noticeable difference. This recipe is simple, affordable, and genuinely effective—exactly what a good lip balm should be.
The beauty of making your own castor oil lip balm is that you control exactly what goes onto your sensitive lip skin. No more mystery ingredients or disappointing results. Just pure, natural nourishment that actually works.
Why not gather the ingredients and make your first batch today? Your dry, cracked lips will thank you, and you might never go back to store-bought options again.