

10 Hallway Wainscoting Ideas for a More Expensive Look
Hallways are easy to overlook because they’re spaces we pass through rather than rooms where we spend much time. But add the right wall treatment and even a plain, narrow hallway can suddenly feel considered, architectural, and considerably more expensive.
This post includes affiliate links. If you make a purchase through them, I may earn a small commission at no extra cost to you. More details here.
Wainscoting is particularly good at creating that effect. Whether you choose classic raised panels, simple picture-frame molding, beadboard, or a taller paneled treatment, it adds depth and character without requiring lots of furniture or decorative accessories.
Better still, hallway wainscoting can work with everything from traditional and cottage interiors to contemporary homes. These ideas will help you choose a style, height, and color combination that makes an ordinary passageway feel much more polished.
Quick Guide: Choose Your Hallway Wainscoting Style
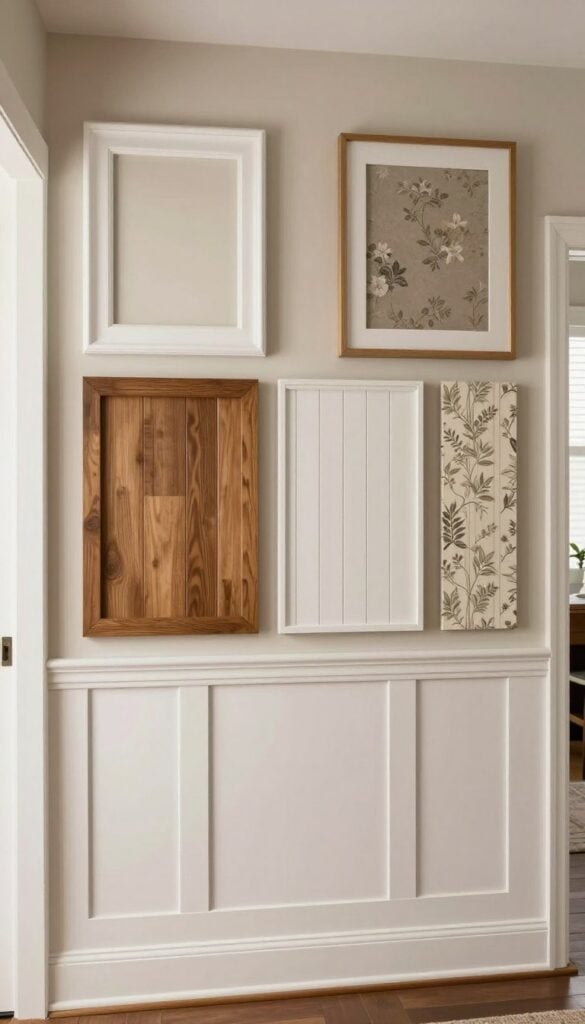
- Narrow hallway: Try simple picture-frame molding painted the same color as the wall for subtle depth.
- Traditional home: Raised panels, decorative trim, and a defined chair rail create a more formal look.
- Cottage style: Beadboard or tongue-and-groove paneling brings relaxed character.
- Modern interior: Choose clean rectangular panels with minimal detailing and a restrained palette.
- Want more drama: Use a deep color on the wainscoting with a lighter shade above.
- Want subtle luxury: Paint the molding and wall in one continuous color for a sophisticated architectural effect.
Before choosing a panel layout, look at the entire hallway rather than one section of wall. Doors, baseboards, stairs, radiators, switches, and other architectural details all affect where the lines of the wainscoting will fall, so planning the proportions first can make the finished result feel far more intentional.
1. Choose Classic Picture-Frame Wainscoting

Picture-frame molding is one of the easiest ways to give a plain hallway an architectural upgrade. Simple rectangular molding applied to the lower portion of the wall creates the appearance of traditional paneling without requiring heavily detailed woodwork.
The proportions make all the difference. Rather than forcing identical rectangles onto every section of wall, adjust the panel widths thoughtfully around doors, corners, and other architectural features so the layout feels balanced.
Painting the molding and wall behind it the same color creates a seamless finish and lets the shadows around the trim provide the detail.
For a Polished Finish

- Keep panel spacing consistent where possible.
- Coordinate the molding with existing trim.
- Plan carefully around doors and corners.
- Paint trim and backing wall together for a built-in look.
Why designers love it: Picture-frame molding creates architectural interest while remaining shallow, making it particularly useful in hallways where bulky decorative features would take up too much space.
2. Paint the Wainscoting a Rich Dark Color

Dark wainscoting can make a hallway feel surprisingly luxurious. Deep charcoal, chocolate brown, navy, forest green, and other saturated shades emphasize the paneling and give the lower half of the room a stronger architectural presence.
Pairing the darker treatment with a lighter wall above can keep the overall scheme balanced, particularly in a hallway without much natural light. Warm metals, wood, and softly colored artwork can prevent the contrast from feeling too severe.
Don’t automatically avoid deeper colors in a narrow space. Used deliberately, they can create depth and atmosphere rather than simply making the hallway feel smaller.
Elegant Dark Shades

- Chocolate brown.
- Charcoal gray.
- Deep olive green.
- Inky navy.
- Muted burgundy.
Creates this effect: A dark lower wall visually anchors the hallway and can make simple molding appear richer and more substantial.
3. Try Tall Wainscoting for a Grander Look

Wainscoting doesn’t have to stop at traditional chair-rail height. Taking the paneling higher up the wall can make it a much stronger architectural feature and works especially well in hallways with generous ceiling height.
Taller panels create an elegant backdrop for artwork and lighting while leaving a smaller section of plain wall above. Depending on the proportions of the space, this can make the hallway feel more established and formal.
The exact height should relate to the ceiling, doors, stairs, windows, and other horizontal lines already present rather than following an arbitrary measurement.
Consider the Existing Architecture

- Ceiling height.
- Door and window proportions.
- Staircase lines.
- Existing baseboards and trim.
- Placement of artwork and lighting.
Designer detail: Treat the top edge of the wainscoting as part of the room’s architecture. Aligning it thoughtfully with nearby features makes the treatment look intentional rather than simply added afterward.
4. Use Beadboard for Cottage Character

For a softer and more relaxed interpretation of wainscoting, beadboard brings instant cottage character. Its repeated vertical lines add texture without requiring lots of additional wall decoration.
Classic white or warm cream keeps the look fresh, while muted sage, dusty blue, or mushroom can give it a more distinctive personality. Beadboard also pairs beautifully with patterned wallpaper above when you want a hallway to feel cozy and collected.
Because the vertical grooves already provide plenty of detail, keep the remaining styling relatively simple with a few framed pieces, warm wood, and natural woven textures.
Pair Beadboard With

- Small-scale floral wallpaper.
- Vintage landscape artwork.
- Warm wood furniture.
- Woven baskets.
- Antique-inspired lighting.
Most timeless option: Warm white or cream beadboard with a simple top rail gives you cottage character without locking the hallway into a strong color scheme.
5. Color Drench the Walls and Wainscoting

If you prefer a quieter and more contemporary look, paint the wainscoting and the wall above in the same color. Instead of creating contrast, the molding becomes visible through light and shadow, giving the hallway depth without dividing the walls visually.
Muted greens, warm taupes, soft gray-blues, earthy browns, and creamy neutrals all work beautifully with this approach. Deeper shades can create a particularly enveloping effect when paired with thoughtful lighting.
You can extend the color onto other trim for an even more cohesive result, although the appropriate paint product and sheen may differ depending on the surface.
Sophisticated Colors to Try
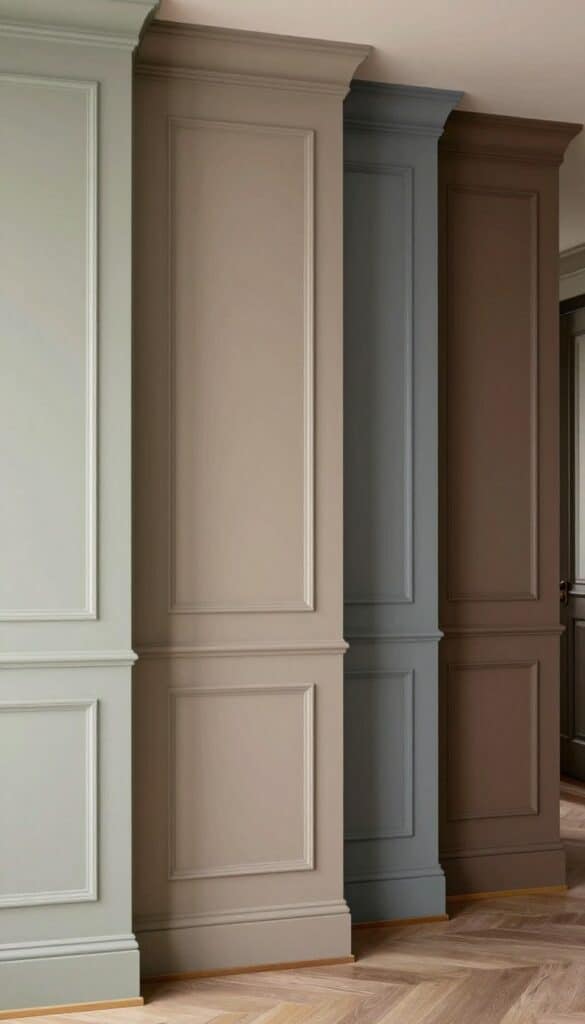
- Muted sage.
- Warm taupe.
- Dusty blue-gray.
- Soft mushroom.
- Deep earthy brown.
Easiest luxury upgrade: Using one color across the wall and molding can make relatively simple trim look more architectural because there are no contrasting edges drawing attention to how the paneling was constructed.
6. Pair Wainscoting With Wallpaper

Wainscoting and wallpaper are a natural combination because the paneling gives a patterned wall somewhere to stop. Instead of covering the entire hallway in print, keep the pattern above the wainscoting and let the painted lower section provide visual breathing room.
Small florals and botanical patterns suit cottage and traditional interiors, while stripes, geometrics, and understated textured papers can create a more tailored look. Pulling one of the wallpaper colors into the wainscoting helps the two elements feel connected.
This is also a clever way to introduce pattern into a narrow hallway without overwhelming it. You still get plenty of personality, but the solid lower portion keeps the overall effect grounded.
Wallpaper Styles to Try

- Small botanical prints.
- Traditional florals.
- Subtle stripes.
- Geometric patterns.
- Textured or grasscloth-effect designs.
Why it works: The wainscoting breaks up the pattern and gives the eye a calmer surface, making wallpaper easier to use in a long or narrow hallway.
7. Keep the Panels Clean and Simple for a Modern Look

Wainscoting doesn’t have to make a hallway look traditional. Strip away ornate detailing and use simple rectangular panels with clean edges for a version that works beautifully in contemporary interiors.
Keep the spacing consistent and use a restrained palette such as warm white, greige, taupe, or muted gray. Minimal artwork and streamlined lighting will reinforce the modern feel rather than competing with the panel layout.
The result gives a plain hallway architectural structure without making it feel formal or overly decorative.
Modern Wainscoting Formula

- Simple rectangular panels.
- Minimal trim profiles.
- Warm neutral paint.
- Clean-lined lighting.
- One or two larger pieces of artwork.
Small space tip: Shallow molding creates the impression of substantial architectural detail without physically reducing an already narrow hallway by much.
8. Create a Sophisticated Two-Tone Neutral Hallway

Two-tone walls don’t need dramatic color contrast to make an impact. Combining two closely related neutrals can highlight the wainscoting while keeping the hallway soft, elegant, and easy to decorate.
Try mushroom wainscoting beneath creamy walls, warm taupe with soft ivory, or muted greige paired with a lighter warm neutral. The slight contrast is enough to reveal the paneling without visually cutting the hallway in half.
Natural wood flooring and warm metal finishes work particularly well with this approach because they continue the understated palette rather than introducing another strong color.
Elegant Neutral Pairings

- Mushroom and cream.
- Warm taupe and ivory.
- Greige and warm white.
- Soft stone and oatmeal.
- Caramel beige and pale cream.
Most timeless option: Choose two shades with similar undertones so the contrast feels deliberate rather than as though the lower half of the wall was simply painted at a different time.
9. Continue the Wainscoting Up the Staircase

If your hallway leads directly to a staircase, continuing the wainscoting upward can make the two areas feel like one cohesive architectural space. It also turns a large stair wall into a feature without requiring an enormous gallery arrangement.
The panel layout becomes more complicated once it follows the angle of the stairs, so careful planning matters. Panel proportions, top rails, baseboards, landings, switches, and the stair angle all need to work together visually.
When done well, the continuous treatment draws the eye from the hallway upward and can make relatively ordinary architecture feel far more custom.
Plan Around
- The angle of the staircase.
- Landings and turns.
- Handrails and trim.
- Doors and openings.
- Existing switches and outlets.
Designer detail: Maintaining a visually consistent relationship between the top of the paneling and the staircase can make the entire installation feel purpose-built.
10. Finish the Look With Statement Lighting and Art

Once the wainscoting is installed, you may find the hallway needs considerably less decoration than before. Instead of filling every panel with something, choose a few pieces of artwork and lighting that complement the architecture.
Wall sconces can emphasize the rhythm of the panels, while larger framed artwork creates focal points along a long hallway. Brass, aged bronze, and black finishes can introduce contrast depending on the style and color of the paneling.
Think of the wainscoting as part of the decoration rather than simply a background for it. Leaving some sections completely empty allows the molding itself to remain visible.
Finishing Details
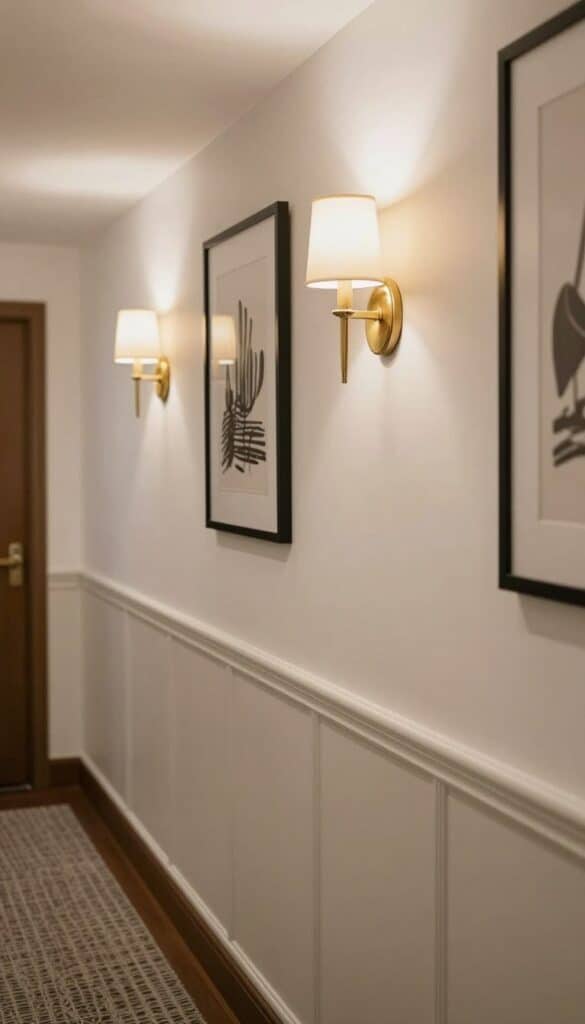
- Wall sconces.
- Framed artwork.
- Statement pendant lighting.
- Warm metal finishes.
- A runner for longer hallways.
Easiest upgrade: Once the paneling provides architectural interest, reduce the number of smaller decorative accessories and give the visual attention to one or two stronger pieces instead.
How to Make Wainscoting Work in a Small or Narrow Hallway

A narrow hallway doesn’t rule out wainscoting. Because molding sits against the wall rather than taking up usable floor space like furniture, it can actually be one of the easiest ways to make a small passageway feel decorated without cluttering it.
- Keep profiles shallow: You can create architectural depth without unnecessarily projecting into the walkway.
- Use fewer, wider panels: Too many narrow rectangles can make a small hallway look visually busy.
- Consider one-color walls: Painting the wainscoting and upper wall alike reduces visual divisions.
- Keep artwork edited: The paneling already provides decoration, so every section doesn’t need a picture.
- Use mirrors strategically: A mirror can introduce reflected light and visual depth while complementing the molding.
- Pay attention to lighting: Wall treatments are especially effective when light creates subtle shadows around the trim.
Small space rule: In a very narrow hallway, simplicity usually looks more expensive. Shallow molding, wider panels, one paint color, and restrained artwork will give you architectural character without making the walls feel busy.
How High Should Hallway Wainscoting Be?
There isn’t one perfect wainscoting height for every hallway. The best proportion depends on the ceiling height, doors, windows, staircase, existing trim, and the particular style of paneling you’re using.
Lower wainscoting creates a more traditional chair-rail effect, while taller paneling makes a stronger architectural statement. In rooms with generous ceilings, taking the treatment higher can look especially elegant.
Before installing anything, mark the proposed top line temporarily along several walls with painter’s tape and view it from both ends of the hallway. This simple test can reveal awkward intersections with doors, switches, stairs, and other features before you commit.
Worth doing first: Don’t choose the height from a single empty section of wall. Step back and judge how that line interacts with the entire hallway.
You Might Also Like
How to Make Hallway Wainscoting Look More Expensive

The expensive look usually comes from proportion and finishing rather than choosing the most elaborate molding available. Even relatively simple trim can look custom when the panel layout relates properly to the architecture around it.
- Plan the entire wall first: Avoid ending up with an awkward sliver of panel beside a doorway or corner.
- Coordinate existing trim: Consider how the wainscoting relates to baseboards, door casings, and other molding.
- Pay attention to spacing: Consistent gaps between panels make even simple molding feel intentional.
- Prepare surfaces carefully: Smooth filling, appropriate caulking, sanding, and neat paintwork can make a major difference to the finished appearance.
- Choose color thoughtfully: Rich monochromatic paint or subtle tonal combinations can elevate relatively inexpensive trim.
- Don’t overdecorate: Give the architectural detail enough empty space to be noticed.
Budget-friendly detail: Simple molding with carefully planned spacing and beautifully finished paintwork can often look more convincing than elaborate trim squeezed into a layout that doesn’t suit the room.
Common Hallway Wainscoting Mistakes to Avoid
Wainscoting looks deceptively simple, but small inconsistencies become surprisingly noticeable once they’re repeated all the way down a hallway. Planning before cutting or installing anything is usually time well spent.
- Choosing the height in isolation: Consider doors, stairs, windows, switches, and existing architectural lines.
- Using too many narrow panels: An overly busy grid can emphasize how confined a small hallway is.
- Ignoring awkward corners: Plan how molding will terminate or continue before installation.
- Forcing every panel to be identical: Balanced proportions are often more important than identical widths when doors interrupt the wall.
- Skipping surface preparation: Uneven walls, visible gaps, and rough paintwork can undermine an otherwise beautiful design.
- Adding too much decor afterward: Remember that the paneling itself is already a strong decorative feature.
The detail that matters most: Measure and sketch the whole layout before you start. It’s much easier to adjust a panel on paper than discover halfway down the hallway that the final rectangle is six inches wide.
Final Thoughts
Hallway wainscoting is one of those upgrades that can make a surprisingly ordinary space feel as though considerably more thought went into the architecture. And you don’t necessarily need elaborate millwork to achieve it. Simple picture-frame molding, beadboard, or clean rectangular panels can completely change a blank passageway.
The secret to making it look expensive is restraint. Choose proportions that work with the hallway, plan the panel layout carefully, keep the finish neat, and let the molding provide much of the decoration.
Add beautiful lighting, a little artwork, and a well-chosen color, and even the hallway you previously hurried through can become one of the most polished parts of the home.
Accent Wall Decor
Discover stylish finishing touches for creating a standout accent wall, from mirrors and wall art to shelves, decorative panels, lighting, and beautiful statement pieces.
Shop Accent Wall Decor